Best HEOS Compatible Speakers: Review and Guide

31 October, 2022 by Admin

Although HEOS makes it easier to work with multiroom audio, the sound could be improved further with dynamics. You can choose HEOS wireless speakers based on your room size and setup scenario. There are several options to arrange a setup. You can pair two HEOS 1 or 3 for stereo and then connect multiple HEOS 5 in different rooms for seamless sound throughout the house.

It always not necessary to pick HEOS compatible speaker. HEOS Link will work with any receiver or amplifier which you can use to set speakers in different rooms. in most cases, HEOS 1, 3, 5 or 7 speakers will result in easier setup and seamless audio playback. Although user experience may tell you about interruptions, this is mostly due to weak Wi-Fi signal.

Denon and Marantz also have receivers with built-in HEOS. With that you can create multiroom sound based on the number of zones. HEOS and Alexa works together that makes controlling speakers quite easy. If you want a soundbar for TV, you can also do this with HEOS. Once you setup the soundbar, use HEOS to connect surround or rear speakers.

What is HEOS and How does it work?

HEOS stands for Home Entertainment Operating System. This is a system that allows multi-room speaker setup wirelessly and is a platform made by Denon. Along with Denon, Marantz receivers also support HEOS feature. Denon has several wireless speakers, soundbars and receivers with HEOS compatibility. You will need internet connection as HEOS will work via Wi-Fi.

Working over Wi-Fi allows transmission of uncompressed audio files. This is a better option than streaming with Bluetooth. It supports MP3, AAC, Apple, DSD, FLAC, wav, wma. Along with streaming from internet or Bluetooth, you can play songs from CD/turntable in HEOS compatible wireless speakers via HEOS amplifiers.

Create stereo or surround sound with HEOS. Make sure to pair speakers of same model or brand for stereo like two HEOS 5 speakers. You can also use HEOS for rear speakers. In case you want HEOS surround, make sure the receiver supports this. If you don’t have a HEOS receiver, then you can also use the HEOS Link. This is a preamplifier via which you can connect non-HEOS receiver or soundbar.

Control Option:

Download the HEOS app in iOS or Android. Install it and you are good to go for installation. The following devices will work with HEOS app: iPhone, iPad, or iPod running iOS 7 or higher, Android Smartphone or Tablet running Android 2.3 or higher and Kindle Mobile device. 

Best HEOS Compatible Speakers:

HEOS wireless speakers are available for different use cases. Based on your room size you can choose the wireless HEOS speaker, or you can also pick a soundbar. HEOS system is quite versatile as you have the option to go for a complete home theater system.

Denon Home 350 Wireless Speaker Review and Guide To Use:

6.04 Mixed Usages
7.6 Music:
6.7 Movies:
1 Outdoors:
6.2 Podcasts
8.7 Voice Assistant:

Denon Home 350 speakers are great for music and produce stereo sound on its own. The speakers have excellent frequency response. It works with Airplay and HEOS; this makes it a versatile speaker. It shows decent performance with movies and shows. Playing music from different streaming platforms is very easy. Make sure you have a stable Wi-Fi connection. While you can also enjoy movies with clear vocals, we suggest a stereo pair or a 5.1 system.

Our Verdict

If you want a versatile speaker with an all-in-one solution, then Denon Home 350 is best for you. Use it to setup multiroom audio with the same song in all rooms or different ones for different rooms. While the bass shows its presence, if you consider yourself a bass head, you will need a subwoofer. The sound quality is engaging and impactful, especially for music.

PROS
  • Supports hi-res audio
  • Clear highs and decent lows
  • Bluetooth and Wi-Fi available
  • Good sonic accuracy
  • Easy to use with multiple control options
CONS
  • No rating against dust or water
Where to Buy

Specification

GENERAL

Recommended Usage Home Bluetooth Speaker , Home Wi-Fi Speaker
Release Year 2019
Power Source AC Only
Multi-Device Pairing: N/A

BUILD QUALITY

Material Quality Great
Water Resistance: No
Dust Resistance No
Floats In Water: No

STYLE

RGB Light: N/A
Color Variation Black and White.
Sizes And Variants N/A

PORTABILITY:

Power Source: AC Only
Hand Carry N/A
Weight 15.0 lbs (6.8 kg)
Volume: 939 in³ (15,390 cm³)
Connectivity: Bluetooth & Wi-Fi and Wired

BATTERY:

Battery Powered: N/A
Battery Life N/A
Charging Time: N/A
Power Saving: N/A
Charging Port: No Battery

Bluetooth Specification:

Bluetooth: Yes
Bluetooth Version: Unspecified
Bluetooth Range: 328.1 ft (100.0 m)
Bluetooth iOS Latency: 575 ms
Bluetooth Android Latency: 499 ms
Multi-Device Pairing: N/A

Wi-Fi Specification:

Wi-Fi: Yes
Wi-Fi Version: Wi-Fi 5
Wi-Fi Frequency Band: 2.4GHz & 5GHz
Apple AirPlay: Yes
AirPlay Latency: 2 ms
Google Chromecast: N/A
Chromecast Latency: N/A

Wired Connectivity:

Aux Input: Yes
USB Audio: N/A
Other Ports: Yes

CONTROLS (physical buttons):

Ease Of Use: Great
Music Play/Pause [Button/Touch]: Yes
Call Answer/End [Button/Touch]: N/A
Volume Up/Down [Button/Touch]: Yes
Track Next/Previous [Button/Touch]: Yes
Microphone On/Off: N/A
Additional Controls: Yes

VOICE CONTROL:

Voice Assistant: Yes
Voice Activation: Yes
Speakerphone: N/A
Alexa: Built-in (Wi-Fi Only)
Siri: No
Google Assistant: No
Microphone Mute: Yes
Far-Field Performance: Excellent
Ambient Noise Performance Excellent

App:

App Name: Heos
iOS: Yes
Android: Yes
EQ: Bass/Treble
Stereo Pair Mode: Yes
Party Mode: Yes
Multi-Room: Yes

AUDIO QUALITY [TESTED RESULT]:

Frequency Response Accuracy: Great
Soundstage: Okay
Dynamics: Decent

IN THE BOX

Accessories: Denon Home 350 speaker, Power cable, Screw for wall mounting.
User manual: Yes

Specs:

  • Supports ALAC, FLAC and WAV files up to 192kHz/24-bit
  • 6 class D amp
  • USB and Aux in
  • Dimension: 380 x 225 x 180 mm
  • Supports Hi-res audio

Denon Home 350 is a one of the HEOS built in speakers that supports both Bluetooth and Wi-Fi. It works with voice assistants. It consists of 2 0.75” tweeters, 2 2” mid-bass drivers and 2 6/5” woofers. Wi-Fi makes it easy to stream from Amazon Music, Deezer, TuneIn, etc. This speaker with Denon HEOS and Alexa makes it easier to control different options with Alexa.

Built-in microphone helps in this case to pick you voice even in noisy environments. It has a glass top and mesh like grille. Build quality is decent. If you are an Apple user, use Aiplay 2 or simply pair with other Aiplay supported speakers. Precise tuning of the speaker ensures balanced audio profile. Although the bass is decent, it is futureproof as it supports sub with built-in HEOS like the Denon DSW-H1.

If you are using the DHT-S716H soundbar, you can use this speaker as surround. You can also use two of these 350 Home speakers as HEOS rear surround speakers. This 350 Home speaker has an average soundstage, and it can get quite loud. If you want a small speaker, then check the Denon Home 150

[amazon box="B0837K4WXB" title= " "] [/amazon]

It has two Class D amplifiers and a total of 4 drivers. If you want to broaden the sound, place it nearby walls. You can pair two of these but, if you use Airplay mostly, you won’t get stereo.

What can you do with HEOS?

With the HEOS app you can tweak bass and treble settings. While using the app, make sure to update it to the latest firmware in order to use Amazon Alexa. With HEOS you can connect two of the speakers or can create You can also pair two speakers together to create a multi-room audio by connecting several speakers in different rooms.

For adding several speakers in a group, use the Room option of the app. Then give the group a name so that it’s easier to understand. The app gives you group volume control or individual volume sliders as well. While setting up speaker using HEOS app, go to the back side and check for a Connect button. A step-by-step instruction is given below as well.

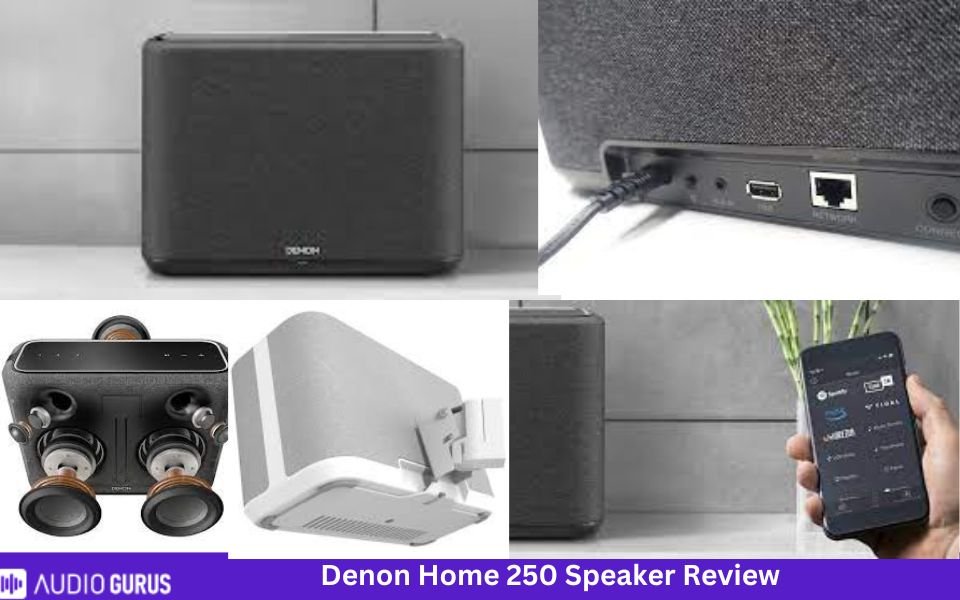
Denon Home 250 Wireless Speaker Review and Guide To Use:
5.7 Mixed Usages
6.8 Music:
6.3 Movies:
1 Outdoors:
6.7 Podcasts
7.6 Voice Assistant:
Specification

GENERAL

Recommended Usage Home Bluetooth Speaker , Home Wi-Fi Speaker
Release Year 2019
Power Source AC Only
Multi-Device Pairing: N/A

BUILD QUALITY

Material Quality Great
Water Resistance: No
Dust Resistance No
Floats In Water: No

STYLE

RGB Light: N/A
Color Variation Black and white
Sizes And Variants N/A

PORTABILITY:

Power Source: AC Only
Hand Carry N/A
Weight 8.16 lbs
Volume: 466.6 in3
Connectivity: Bluetooth & Wi-Fi and Wired

BATTERY:

Battery Powered: N/A
Battery Life N/A
Charging Time: N/A
Power Saving: N/A
Charging Port: No Battery

Bluetooth Specification:

Bluetooth: Yes
Bluetooth Version: 802.11ac
Bluetooth Range: N/A
Bluetooth iOS Latency: N/A
Bluetooth Android Latency: N/A
Multi-Device Pairing: N/A

Wi-Fi Specification:

Wi-Fi: Yes
Wi-Fi Version: Wi-Fi 5
Wi-Fi Frequency Band: 2.4GHz & 5GHz
Apple AirPlay: Yes
AirPlay Latency: not specified
Google Chromecast: N/A
Chromecast Latency: N/A

Wired Connectivity:

Aux Input: Yes
USB Audio: Yes
Other Ports: Yes

CONTROLS (physical buttons):

Ease Of Use: Great
Music Play/Pause [Button/Touch]: Yes
Call Answer/End [Button/Touch]: N/A
Volume Up/Down [Button/Touch]: Yes
Track Next/Previous [Button/Touch]: Yes
Microphone On/Off: Yes
Additional Controls: Yes

VOICE CONTROL:

Voice Assistant: Yes
Voice Activation: Yes
Speakerphone: N/A
Alexa: Built-in (Wi-Fi Only)
Siri: No
Google Assistant: No
Microphone Mute: Yes
Far-Field Performance: Excellent
Ambient Noise Performance Excellent

App:

App Name: HEOS
iOS: Yes
Android: Yes
EQ: Bass/Treble
Stereo Pair Mode: Yes
Party Mode: Yes
Multi-Room: Yes

AUDIO QUALITY [TESTED RESULT]:

Frequency Response Accuracy: Great
Soundstage: Decent
Dynamics: Okey

Rating System

Music: 6.79
Movies: 6.31
Outdoors: 1
Podcasts 6.74
Voice Assistant: 7.64

IN THE BOX

Accessories: Denon 250 speaker, AC power cord, Screw, Quick Start Guide, Safety Instructions, Warranty Information
User manual: Yes

Specs:

  • 4 class D amps
  • Has proximity sensor
  • 3 quick preset buttons
  • Dimension: 295 x 216 x 120 mm

What if Denon Home 350 is too large and Home 150 is too small for you? Well, Denon has got your back. You can see this Denon Home 250 wireless speaker which falls between 350 and 150 in terms of size and sound. Inside the speaker there are two 0.75” tweeter, two 4” mid-bass driver and a 5.25” passive radiator. It has crystal clear treble and precise midrange.

Similar to Denon 350, it works with Alexa and supports streaming through Bluetooth or Wi-Fi. The performance is adequate if placed in mid-sized rooms. You can use it to play music and it can get quite loud. It is better to use it as front speaker near walls rather than rear. Before you feel too much disappointed, understand that these are mono speakers. Pairing two of them might improve the sound.

Speaker placement plays a huge role in the audio quality. Denon HEOS speaker manual suggests placing it 3 to 12” from the wall and around 12” from TV or PC. Make sure to place it nearby your listening position and within Wi-Fi range for stable connection. In case you want to play music from PC or NAS, use the app, go to Music option and select Music Server.

Denon Home 250 Bluetooth compatibility allows you to stream files from Bluetooth enabled devices. You can also stream content from iPhone, iPad or iPod if it is upgraded to iOS 10.0.2 or later versions.

What can you do with HEOS?

HEOS app and system works in the same way as in Home 350 speakers. The app is user-friendly and is easy to use. Creating multiroom is simply a press away. You will experience True multiroom audio with HEOS. You can the same song in all rooms or different songs in each room. Connect additional wired speakers with Ethernet cable and the speaker’s name will appear on the app.

If you want to add wireless speakers, go to Settings in the app and click on Add device. With HEOS, this Denon Home 250 speaker can connect to 100000 internet radio through TuneIn. For changing the speaker performance, go to the EQ settings in the app to adjust bass or treble.

Denon HEOS 5 Review and Guide To Use:

[amazon box="B00KJJW39I" title= " "] [/amazon]

Specs:

  • 4 Class D amp
  • Picture formats: PG, PNG, BMP and GIF
  • Audio formats: WMA, AAC, MP3, WAV, ALAC and FLAC
  • Dual band Wi-Fi
  • Dimensions: 209 x 294 x 166 mm

 Denon HEOS 5 has a neutral audio profile. It delivers sound with optimum clarity. It has two tweeters, two woofers and a passive radiator. It is best for medium sized spaces in living room, bedroom or offices. If you prefer stereo sound or have a large space to cover, it is best to use HEOS to connect two of these HEOS 5 speakers.

Acoustical processing algorithms enhance the audio quality. Use Alexa to control audio playback with your voice. Go to Alexa app and press on Skills options. Add and enable the HEOS Home Entertainment. In the Smart Home option of Alexa app, find out your speaker. You can use Alexa to control other HEOS compatible speakers as well.

You can also use Google Assistant with HEOS. With the help of Google Home, app or device with built-in Google Assistant to use and control options with voice. HEOS speakers have very easy setup and installation procedure. They excel in producing sound from these compact speakers due to intelligent engineering.

The speaker size is different from others and although it isn’t a battery powered portable speaker, it comes with a handle. We presume its because you can hold it to carry it from one place or room to another. On the rear side you will see the following ports: USB port, 3.5mm audio jack and Ethernet. HEOS 5 speaker is powerful than the HEOS 3 but HEOS 7 is much better than the 5.

What can you do with HEOS?

With HEOS app, you can stream content from Spotify, TuneIn, SoundCloud, TIDAL, Deezer, Napster, etc. You can also play files from USB, NAS, smartphone or tab. It supports multiroom and Hi-res audio. Once the setup is complete, the speakers will become available in different music streaming apps like Spotify, TuneIn or others.

HEOS app integrates quite well with those music services. If you face any connection interruption with HEOS, or feel discouraged by reading other user feedback, understand that each user has a different setup. If the Wi-Fi network faces a barrier by travelling through walls or too many devices are connected that makes it congested, playback might be interrupted. So, make sure your internet has strong signal and is stable.

Denon DHT-S716H Home Theater Soundbar Review and Guide:

[amazon box="B07XPF1BNM" title= " "] [/amazon]

Specs:

  • 6 Class D amp
  • Supports WMA, AAC and MP3, FLAC, WAV and ALAC
  • JPG, PNG, BMP and GIF
  • 72 x 1100 x 148 mm

Denon DHT-S716H is a 3.0 soundbar that has a total of 9 drivers. There are three tweeters and six mid-range cones.  This Denon HEOS soundbar delivers rich and deep audio. Its warm sound profile ensures movies are engaging. Just because it is a standalone soundbar doesn’t mean it is poor sounding. It is futureproof so if you want you can add wireless sub and surround sound.

With a length of 43.3”, you can easily place it under 55 or 65” smart TVs. If you aren’t satisfied with single soundbars, you can always check Denon HEOS 5.1 home theater system. For smaller setup, a 3.1 home theater system is also available. It supports the following surround sound formats: Dolby TrueHD, DTS-HD Master, Dolby Digital, Dolby Digital Plus, DTS Decoding.

However, you won’t find Atmos of DTS: X. if you want 3D sound with Dolby Atmos and DTS:X, you can check the

Denon Home 550 compact soundbar Review

7.1 Mixed Usages
7.1 SOUND QUALITY
7.1 BASS ACCURACY :
8.7 AUDIO & VIDEO LATENCY:
4.6 AUDIO ENHANCEMENT FEATURES:
8 BUILD QUALITY :
Specification

GENERAL

Number of Channel 2.0 Channel
Placement Type Wall-mountable
Connectivity Type Both (Wired & Wireless)
Subwoofer Feature Without Subwoofer
Rear Speaker N/A
Central Channel Speaker N/A
Audio Enhancement Features Yes
HDMI input/output Yes
Analog Audio In 3.5mm (Aux) Yes
Loudness High Volume ( > 92db )
Warranty 24 months Months

Connectivity:

Digital Optical Audio Input ( Toslink ) 1 Optical Audio Input
HDMI ARC 1 (shared)
HDMI Out 1 (shared)
Full HDMI In 1
Analog Audio In 3.5mm (Aux) 1
RCA Ports
USB Port 1 USB Port
Ethernet Jack Yes

Audio Quality ( Tested )

Dialogue & Vocal Accuracy Frequency deviation from target is less than standard error (3.4 dB ); which means soundbar is very good to reproduce dialog and instrumental music
Bass Accuracy ( for music, film scores, movies, and games) Soundbar 's Low-Frequency-Extension is more than 35 Hz. Which means It can reproduce the deep thump and rumble in the low-bass accurately.
3- Dimensional Sound Accuracy ( Sound Stage) soundstage has good focus overall but but some sound tracks seem to be bit more diffused and lack separation.
Total Harmonic Distortion ( Center Channel ) No Dedicated Center Channel Speaker. So, it can not produce sound quite as clear as 3.0, 3.2 , 5.1 or 7.2 channels Soundbar. But It has decent center performance to produce accurate audio and dialogue.
Surround Sound Imaging ( Rear Channel ) No dedicated or alternative channel for surround content. So it downmixes surround content to stereo.
Streo Dynamics ( Loudness ): Dynamic Range Compression @ Standard Volume (80 dB) is more than standard deviation (<2 dB).
Audio & Video Latency Here no visible latency via ARC (15 ms) and Optical (38 ms) but visuals difference may found via Full HDMI Input (-56 ms).

Audio Enhancement Features:

Digital Room Correction: N/A
Auto Volume Adjustment/ Night Mode: Yes
Equilizer Options: Presets
Bass Adjustment ( Thump & Punch of sound) Yes
Treble Adjustent ( Brightness and Clarity od Audio) Yes
Surround Level Adjustment: N/A
Virtual Surround Effect: Yes

Supported Audio Format ( HDMI ARC)

eARC Standard Yes
Dolby Atmos Yes
Dolby Digital Yes
Dolby Digital Plus Yes
DTS Yes
DTS: X Yes
Dolby True HD ( eARC only ) Yes
DTS- HD MA (eARC only) Yes
5.1 PCM ( eARC only ) Yes

Supported Audio Format (Full HDMI In' port ):

Dolby Atmos : Yes
DTS:X : Yes
Dolby Digital : Yes
Dolby Digital Plus: Yes
DTS : Yes
Dolby TrueHD : Yes
DTS-HD MA : Yes
5.1 PCM Yes

Audio Format Support ( Optical Port ):

Dolby Digital : Yes
DTS : Yes

Drivers Specs

Tweeter Size and Type : 0.75" Dome (2)
Midrange Size & Types: 2.1875" Cone (4)
Woofer Size & Type : 2"x3.5" Passive Radiators
Subwoofer Driver None
Other

Build Material

Enclosure Passive Radiator
Finish The Denon has a great build- made of plastic, its feels solid and durable. Sides of the bar is made of fabric.
Color Black
Soundbar Width 25.6" (65.0 cm)
Soundbar Height 3.0" (7.5 cm)
Soundbar Depth 4.8" (12.2 cm)
Subwoofer Width N/A
Subwoofer Depth N/A

Rating System

SOUND QUALITY 7.1
BASS ACCURACY : 7.1
AUDIO ENHANCEMENT FEATURES: 4.6
AUDIO & VIDEO LATENCY: 8.7
BUILD QUALITY : 8

It has 4K HDMI Input and HDMI Output so connection with TV is much easier. Four HDMI input is much better than one or two and will be an advantage for people with several devices to connect.

You will also find analog line in, USB, optical (Toslink) and RCA digital audio in.Controlling this Denon HEOS soundbar is easier with knobs on the bar itself, or the remote. Remote isn’t backlit but with few buttons, it is user friendly. The remote has few buttons that includes 6 presets. You can save customized inputs with different sound mode and volume level. Similar to other Denon HEOS speakers, this soundbar doesn’t support Airplay.

What can you do with HEOS?

Similar to other Denon speakers, this soundbar supports HEOS multiroom audio. So you can play music files or TV audio to other HEOS compatible speakers. With HEOS expand this 3.0 system to 3.1 or 5.1 home theater system. Connect HEOS built-in speakers like HEOS 3 speakers along with a HEOS subwoofer like the DSW-11 model.

HEOS outdoor speakers:

[amazon box="B01CTUJQL2" title= " "] [/amazon]

HEOS 1 is a Denon wireless outdoor speaker that you can use in indoor as well. It is humidity resistant to suit well in outside environment. Splashguard protection ensures that it remains protected against water splashes. This compact speaker can deliver a punch and you can enjoy music by streaming through Wi-Fi or Bluetooth. it has a good battery life of around 6 hours.

Heos compatible Devices for Speakers:

Multiple speakers throughout the house need a media to connect each other. For this, HEOS amplifier and receivers will help.  The Drive HS2 is a HEOS multi zone amp with which you can create a 4-zone multi-room speaker system. If you have wired speakers and want a multiroom setup with Bluetooth, you will need a HEOS Amp HS2.

Denon HEOS LINK Wireless Pre-amplifier User Exprience:

1 Mixed Usages
1 VIDEO FEATURES:
1 CONNECTIVITY OPTIONS:
1 AUDIO FEATURES:
1 MULTIZONE:
1 AMPLIFICATION:
Specification

General

Receiver Type Preamp
Number Of Channel 2 Channel
Number Channel Processing 2
Audio Feature Auro 3D
Video Feature 4K Passthrough
Watts Per Channel 100 W
Zones 4
Radio Internet Radio , Pandora , Spotify , Tidal , SiriusXM
Amplifier

Connectivity

Ethernet Yes
Wi-Fi Yes
Bluetooth Yes
USB Yes
RCA LIne Input: yes
RCA LIne Output: N/A
RCA Pre-Outs: N/A
XLR Line Inputs: no
XLR Pre-Outs: N/A
Phono Input: N/A
Optical Inputs: 1
Optical Output: 1
Coaxial Inputs: N/A
Multi-Channel Input: N/A
Headphone Out: No
HDMI Inputs: No
HDMI Outputs: No
8K Inputs: No
Composite Video Input N/A
Composite Video Output: N/A
Component Video Input: N/A
Component Video Output: N/A
Front A/V Inputs: N/A
Speaker A/B: N/A

AUDIO FEATURES:

Maximum Channel Processing 2
Dolby Atmos no
Dolby Atmos Height Virtualization N/A
Dolby Atmos Music N/A
Dolby TrueHD N/A
Dolby Digital Plus N/A
Dolby Surround Upmixer N/A
Dolby Pro Logic N/A
Dolby Digital EX N/A
Surround EX N/A
DTS:X N/A
DTS Neural:X N/A
DTS Virtual:X N/A
DTS Neo N/A
DTS-HD Master Audio N/A
DTS-HD High Resolution Audio N/A
DTS 96/24 N/A
DTS Express N/A
DTS-ES N/A
IMAX Enhanced N/A
PCM 16-bit, 20-bit,
Music Playback via USB yes
High Resolution Music Playback via USB and/or Network yes
High Resolution Audio Formats via USB FLAC, WAV, ALAC, DSD (up to 2.8 MHz and 5.6 MHz), MP3, WMA, AAC, AIFF
Gapless Playback Yes
DSD via HDMI N/A
DSD via USB yes
DSD to PCM Converter Yes
USB DAC Yes
Jitter Reduction N/A
DTS Dialog Control N/A
Dialog Enhancement N/A
Dialog Level Adjustment N/A
Dialog Normalization N/A
Dialogue Lift N/A
Compressed Music Enhancer n/a
High-resolution Music Enhancer N/A
Audyssey Dynamic EQ N/A
Audyssey Dynamic Volume N/A
Audyssey LFC N/A
Audyssey Sub EQ HT N/A
Audyssey DSX N/A
Direct Mode N/A
Pure Direct Mode N/A
Independent Subwoofer Outputs Yes
Auto Speaker Calibration System with Mic. n/a
Audyssey App Support N/A
Bass Sync N/A
Optimized Bass Redirection N/A

VIDEO FEATURES:

HDMI Version N/A
Enhanced ARC N/A
HDCP Version N/A
HDR10+ N/A
Dynamic HDR N/A
Dolby Vision N/A
HLG (Hybrid Log Gamma) N/A
QMS (Quick Media Switching) N/A
3-D Ready N/A
Video Signal Passthrough N/A
Video Signal Upscaling N/A
Analog To HDMI Upconversion N/A
Component Video Upscaling N/A
isf Certified Calibration Control N/A

Amplifiers

Channels 2
Front Wide Channel Support N/A
Current Feedback Topology N/A
Discrete Amplification N/A
HDAM N/A
THX™ Certification N/A
Continuous 6 Ω Rated Yes
Certified 4 Ω Performance Yes
Bi-amp Capability no

Gaming Features

Auto Low Latency Mode (ALLM) N/A
Variable Refresh Rate (VRR) N/A
Quick Frame Transport (QFT) N/A

Zones

Zones 8
Powered Zones n/a
Zone 2 Outs n/a
Zone 3 Outs n/a
RS-232C Interface N/A
+12V Trigger Output 1

Radio

Analog Tuner n/a
Digital Radio N/A
Internet Radio TuneIn
Pandora Yes
Spotify Yes
Tidal Yes
Deezer Yes
SiriusXM Internet Radio Yes
Napster N/A

Additional Features

On-Screen Display no
GUI Languages 12
Web Browser Control N/A
IP Control for CI Yes
Control4 SDDP Yes
PreAmp Mode Yes
Display no
Remote Controller no
Remote Control In/Out no
LCD Display N/A
Detachable Power Cord N/A
Setup Assistant Yes

Power

Power Output (6 Ω, 1 kHz, 2 n/a
Rated Power Output (6 Ω, 1 kHz, 1 channel driven, IEC) n/a
Dynamic Power per Channel (3 Ω, Front) n/a
Dynamic Power per Channel (4 Ω, Front) n/a
Dynamic Power per Channel (8 Ω, Front) n/a
Power Output (8 Ω, 20 Hz - 20 kHz, 2 n/a
Maximum Effective Power Output (6 Ω, 1 kHz, 1 channel driven, JEITA) n/a
Power Supply AC 120 V, 60 Hz (for North America) AC 220 - 240 V, 50/60 Hz (for Europe)
Toroidal Transformer N/A
Power Consumption 20W
No Sound Power n/a
Standby Power n/a

Rating System

AUDIO FEATURES: 1
VIDEO FEATURES: 1
CONNECTIVITY OPTIONS: 1
MULTIZONE: 1
AMPLIFICATION: 1

Build

Dimensions (W x H x D) 6.1x2.9x7
Weight 1.3 kg
Chassis ABS plastic
Front Panel status led
Speaker Terminals 4
Large Speaker Terminals n/a
Color-Coded Speaker Terminals N/A
Transparent High-Grade Speaker Terminals N/A
High Grade Audio Components N/A
ECO Mode / Hybrid Standby Function N/A
Auto Power off Yes
Warranty 2 years

Specifications

THD digital n/a
Analog Distortion n/a
Phono Distortion n/a
Input Sensitivity and Impedance (Line) 200mV/10 kΩ
Input Sensitivity and Impedance (Phono MM) n/a
Rated Lineout Level and Impedance n/a
Rated Output digital n/a
S/N Ratio (Line, IHF-A) n/a
S/N Ratio (Phono MM, IHF-A) n/a
S/N Ratio (digital) n/a
Phono RIAA Deviation n/a
Frequency Response (Analog In) 10 Hz to 100 kHz (+1 dB, -3 dB)
DSD Sampling Rates via HDMI n/a
DSD Sampling Rates via USB 2.8224/5.6448 /11.2896 MHz
Video Input Sensitivity/Output Level and Impedance n/a
Video Frequency Response n/a
Ethernet Standard IEEE 802.3ab
Wi-Fi Standard 802.11ac
Wi-Fi Terminal Frequency 2.4, 5GHz
Bluetooth Version 4.2
Bluetooth Frequency 2.4 GHz
USB Terminal type-a
FM Frequency n/a
FM 50 dB Quiet Sensitivity (IHF, 1 kHz, 100% MOD.) n/a
FM S/N Ratio n/a
FM Harmonic Distortion (IHF, 1 kHz) n/a
AM Effective Sensitivity n/a
AM Frequency n/a

Specs:

  • Frequency response: 10 Hz to 100 kHz: +1, -3dB
  • Dual band Wi-Fi
  • S/N ratio: 100 dB
  • 74 x 155 x 150 mm

With Denon HEOS Link preamplifier, you can connect any receiver, amplifier or home audio and create multiroom wireless system. On the front panel there is a status LED and on the top section you will find volume and mute button. The rear panel is flooded with ports: IR out, Trigger out, Coax out, optical out, optical in, USB, aux in, analog pre out, subwoofer connector, etc.

It also has two buttons: Bluetooth and Connect. Place the preamp close to the device through which you will connect speakers to create multiroom. It could be a receiver or amp. Also, make sure to be within strong Wi-Fi range. It supports the following files: WMA (192kbps), AAC and MP3 (320kbps), WAV, ALAC and FLAC: (24-bit/192kHz) and DSD (2.8MHz, 5.6MHz).

Looking into consumer feedback, we didn’t encounter any app bugs. Use the free app, create an account and go through any available firmware update. When connected to a good quality device, the sound is pleasing and impressive. It can transfer high-res digital file to external DAC or vintage stereo receiver. Whether you are connecting an old school receiver or speakers, the audio is glorious and noteworthy.

Connect the receiver or amp through preout, coax out or optical out. To achieve a HEOS multiroom system you can connect wired or wireless speakers. For wired speakers you need Ethernet cable. You can stream content from external device and play it through the network to multiple speakers. Use the EQ settings to adjust bass and treble. For changing the sound, you can select either Normal or High.

Denon HEOS Link allows streaming from music services, via Bluetooth, or connecting other devices. This HEOS preamplifier will work with both Denon and Marantz receivers but make sure they are sold after 2010.

Denon (AVRS540BT) 5.2 Receiver User Experience and Review:

[amazon box="B07C49F2LD" title= " "] [/amazon]

Spec:

  • Stereo RMS power: 70W
  • Discrete power amp
  • Supports HEOS Link
  • Built in Bluetooth
  • Dimension: 17.2x6x13.4”

While we talk about Denon or Marantz receivers, Audyssey room calibration software is something that we look into. Denon AVRS540BT doesn’t support Audyssey or AirPlay. It supports DTS HD Master, Dolby TrueHD. For wireless multiroom audio, you need to connect it to Denon HEOS Link. The front panel is made of metal and quality of construction is very good.

It has 5 HDMI In, I HDMI out, composite in, analog in, optical in, sub out, etc. It can smoothly drive high quality speakers. Audio quality is rich and detailed with excellent dynamics. It supports 4k @60Hz input and output. If you connect it to a 4k Ultra HD TV, you can enjoy high resolution images. With HDR 10, HLG, DV and BT.2020, you will view vibrant colors.

As it supports 3D video passthrough, you can connect it to 3D-compatible Blu-ray, games and broadcast devices to 3D-compatible HDTVs. Multiple HDMI inputs allow you to connect different devices like Blu-ray Disc players, game consoles and etc. Go wireless with Bluetooth connection and stream through smartphone or tab.

GUI and setup assistant make the installation easier. The remote control has several buttons and you can use it to adjust channel level button, select sound mode and etc. You can create a 5.1 home theater system and also connect additional sub with sub out. Multiple subwoofers are better than a single one. Two or four subwoofers deliver broader sweet spot in terms of lower frequencies.

This receiver is packed with several settings and adjustment option. You can select room EQ or set Surr. Parameter. For Auto setup use the Sound Calibration microphone and place it on listening position. Use the Manual setup option if you want to set each option like crossover, distance, bass, levels, manually.

Marantz Receptor AV 8K Ultra HD SR5015 User Exprience:

[amazon box="B08F9ZHQTF" title= " "] [/amazon]

Specs:

  • Supports voice assistants
  • 4k and 8k signal passthrough
  • Multiple HDMI ports
  • Power output: 100 W (8-ohm, 20 Hz - 20 kHz, 0.08% 2ch Drive)

Unlike Denon, this is a Marantz receiver with built-in HEOS. It also has several basic features that are missed out in Denon. It supports Wi-Fi, AirPlay and Dolby Atmos. This Marantz NR1510 Slim 5.2 Channels supports Amazon Alexa, Google Assistant and Apple Homepod.For multichannel surround, it supports DTS HD Master, DTS:X, DTS Neutral:X, DTS Virtual:X, Dolby Atmos Height Virtualization.

All these means you will receive an engulfing, room filling audio with overhead effects when connected to speakers or soundbar. This means movies will be immersive, realistic with enveloping sound. It uses Audyssey MultEQ XT room calibration software and supports Dynamic EQ and Dynamic Volume. Aydyssey is one of the most reliable software for room calibration.

It is one of the best HEOS multizone receiver that is suitable for any type of content. With this 7.2 channel HEOS receiver, you can create a 5.1.2 home theater. Dedicated Atmos speakers will produce powerful sound. If you want to create multiroom audio, you can create a 5.1 system and use two channels to play audio in another room.

HEOS multiroom integrated feature allows two zones. In terms of connectivity, it has 6 HDMI In and 2 out, there are other basic ports like composite in, analog in, optical, coax, 2 sub out, USB, etc. With built-in phono in, you can also connect turntable. Support for HDR, HLG, Dolby Vision, HDR10+, Dynamic HDR makes images clearer and richer.

Picture adjust and noise reduction improves picture even more. The receiver wins in terms of dynamic range and excellent clarity. choose any one of the audio enhancements as per the content: DRC, Cinema EQ, etc. HDMI 2.1 with the support for VRR, ALLM and QFT makes it the best HEOS built-in receiver for gaming. Lower lag and faster response time make the gaming scenes clear.

How to setup HEOS?

Follow these steps to establish HEOS connection. The image will give you an idea of on screen prompts:

  • Plug in the speaker to the power outlet and place it in desired position.
  • Take you smartphone, go to HEOS app
  • Use the audio cable to insert into Aux in of the speaker and headphone out of the smartphone
  • Tap on next and check LED light on the speaker to see if its yellow.
  • Then press on the Connect button on the speaker
  • See whether the light glows green continuously
  • On the app, select Next. The light will be solid green
  • Then select ‘light is solid green’
  • Connect the speaker to the Wi-Fi
  • Since you have multiple speakers, give a name for the speaker and the room

HEOS vs Sonos:

[amazon bestseller="Sonos multiroom speakers" template="bestseller_table" items="5"]

Comparing Sonos and HEOS, the HEOS supports 5GHz band of Wi-Fi which isn’t available in Sonos. Sonos supports multiroom as well where you can connect speakers in different rooms over Wi-Fi. Some of the best Sonos multiroom speakers are Sonos Play 1, Play 3, etc. Denon HEOS is comparatively pricier than Sonos systems.

Bluetooth function is available in all Denon HEOS compatible speakers or receivers. With Sonos, this isn’t the case. It’s rare to find a speaker with Bluetooth, Sonos Move is one of them. Sonos app is simple and easy compared to HEOS app. Consumers sometimes complain about lag or bug issues of HEOS app. For others HEOS app worked smoothly.

HEOS app has more function, features and options. If you get to know them you won’t find it harder to use. Setup or installation is easy for both but with Sonos it might be easier.

Parting words:

Are you looking for a HEOS compatible speaker? Some of the best HEOS compatible speakers are HEOS 5 and Home 350. If you want a HEOS compatible outdoor speaker, you can use HEOS 1. Denon HEOS gives you the freedom to spread audio throughout your house in the easiest way possible. Streaming via music services and Bluetooth is the best way to listen to music.

Denon HEOS is a versatile multiroom platform with unlimited possibilities. Consumers also use Sonos for audio in multiroom and it is a competitor of Denon. Denon is best for home theaters. This is because they excel in making the best receiver or amplifiers. If you want a home theater and multiroom audio, this is possible with Denon receiver with HEOS built-in.

HEOS app works well but some may experience few issues as well. Grouping different speakers for different rooms and naming them makes it easy for you to understand. User manual will help you understand each option and how to use the HEOS app. Most HEOS compatible speakers work support Airplay or you can connect smartphone with 3.5mm port. 

What is HEOS Link?

Instead of selecting a HEOS compatible speaker, you can choose HEOS Link. This preamplifier with HEOS will work with receivers or amplifiers that doesn’t support multiroom audio.

Which HEOS speaker is right for me?

HEOS 5 and 7 wireless speakers are best for large spaces, HEOS 3 speaker is best for medium sized rooms. In space limitations, use the HEOS 1.

More Articles


Why Can't I Download Apps on My Samsung TV
It's very annoying when you can't download new apps on My Samsung TV. If you can't download apps on your Samsung smart TV, there might be a number of different problems. There are many things that could cause this to happen. let's find out Why Can't I Download Apps on My Samsung TV. Users or reviewers of Samsung's Smart TVs don't often tell us about problems with the ones they have now. The company has upgraded its user interface and app platforms multiple times over the previous decade, and as a consequence, everything operate smoothly. But every tech fan knows that there will always be products and services that don't live up to expectations. We've written this article just for Samsung smart TV owners who are having trouble installing applications. Let's get on with the article. Why can’t you download apps on Samsung TV? So, you're probably wondering why you can't get any more apps for your Samsung smart TV. A number of factors might be at play, including outdated software, bad network connectivity, and technical faults or snags. The first step is to determine whether the problem is exclusive to one app or if it affects all of them. But if you can't download an app, it may be a problem for the app's developers. Continue reading to learn how to resolve troubles with downloading any app- Read: 10 Mistakes Hooking Up Home Theater Network Issue If you're having trouble getting online, it's probably because your modem is too far away from your TV, or because your internet connection doesn't seem to be powerful enough. Your network adapter should be placed near your television so that you don't have to deal with connection troubles. Old Firmware Keeping your TV up to date is just as important as keeping your Android mobile up to date. Keeping the applications up-to-date is essential to ensure that they run properly and without interruption. In addition, your TV's settings must match the applications, which implies that the software on the television should match or be capable of handling the apps efficiently, as well. Temporary Issue There are often temporary problems when apps, the network, or perhaps even the TV can't connect or get updates. Such transitory issues may be resolved by restarting the components that may be experiencing issues and resolving them as soon as possible. The most common reason of "temporary difficulties" is a hiccup in the app store or TV program owing to a connection problem or a simple loading problem. Location is set wrong Several times, the app store's location is input incorrectly, which might lead to problems since the app store's service cannot be located. The place where you live should be specified in the location field since the internet service will be from the same area. To make it easier for the app store to connect to your TV, the TV software has a real - time location setup. The issue in streaming plans If you can't download applications on your Samsung smart TV, there must be an issue with the streaming plan that prevents you from doing so. If you're having trouble downloading applications, it might be because your streaming plan has a limit on the number of apps you could download, or because your recharge hasn't been recognized. There might be a number of problems that need to be addressed, so keep reading. Read: 10 Things To Improve Home Theater How can you fix the downloading issue on Samsung Smart TV? The first step is to reinstall the AppStore to check whether it was just an error that occurred when troubleshooting. Reopen App Store If you're having trouble with your Samsung smart TV, the first thing you should do is open the app store again. If you couldn't get to the app store, you could easily fix the problem by reopening the app. So make sure that this is the first thing you try to fix. If you're in a hurry and the Samsung TV app listing you want is taking a long time to load, you should try reopening and refreshing the app. This way, you won't have to waste several minutes reloading a list of apps that you don't use. Read: Over-Ear vs In-Ear vs On-Ear Headphones: Explain with Example Restart Your TV Unplugging and re-plugging in your TV is a good first step for many problems. This might be the solution you're searching for, whether you're trying to repair a faulty remote or upgrade the software. You can power cycle your TV if it won't respond to a button press, the remote control, or any other signal. The process will use up power from your TV as well as force it to start over from scratch the very next time you switch it on. If your device isn't working right, having to turn it off and on again can often fix the problem. Here's how to turn the TV off and on again: Press the power button to turn off the TV. Pull the power cord out of the wall socket. Wait a minute. Connect the power cord to the outlet again. Press the TV's power button. Now, check your Samsung Smart TV to see if you can install the apps. Read: How to Turn on Sony Soundbar without Remote Logout and Login To App Store Again Samsung's App Store could be at blame if you're having trouble downloading apps from the TV. The best thing you can do to fix this is to log out of the App Store and then log back in again. On your Samsung Smart TV, open the Samsung App Store. Click the button on your remote that says "Settings." It shows the Settings Menu. On the Settings Menu, click Sign Out. There will be a confirmation window. Click "OK" to move on. You will be logged out of the Samsung Smart TV App Store. Wait a few minutes after logging out of the app before logging back in. When you are ready to move on, press OK on your remote to confirm. Downloading applications should work again after logging out and back in to the Samsung TV App store. Check Network Connection Issue Like Google Play and iTunes, Samsung TVs have an app store. You can get these apps on your TV as long as it is connected to Wi-Fi or mobile data. TV apps won't work right if there's a problem with the internet or if you're in an area with poor service. On the home screen, look for a blue "Wi-Fi" emblem to see whether your TV is internet-connected. For those who have problems connecting to their home Wi-Fi, there are several things you can try. Make sure you're connecting to the right network and that the signal is strong. To get a good signal on your TV, place it near your modem or router. If your router is less than 5 feet away, you may want to use an Ethernet cable. This will be the quickest way to get your devices connected to the internet. Make sure you are using the most recent Wi-Fi password if you are using Wi-Fi. Also, if you can, put your router up high. It will make the signal and speeds stronger. Sometimes Wi-Fi just needs a reboot. And if restarting your router doesn't help, you can try moving it closer to your TV. You can also use an Ethernet cable, which can work. A website's loading speed could be an issue, just as it would be for a user. Still, speed isn't the only issue when it comes to network problems. When doing online speed tests, you need to watch out for things like high ping, or latency, rates, low bandwidth, and blocked ports. If you have a fast Internet connection, your ping rates will be very low (under 100 ms). Contacting your internet provider is always a good first step when there's a problem. They can help you figure out what's wrong or make sure everything is set up right. Check Location Settings Before you can use your smart TV, you need to make sure the location settings are correct. Your TV needs to be set up for the right country in order to access the internet. For example, if your geolocation settings are incorrect, your smart TV will simply stop connecting to the internet. This is a rather typical occurrence, particularly for people who purchase their TVs in another country and then bring them back to their own country. When you're using a Samsung TV, where do you go to change your location? Changes to your device's location are simple. Once under "Network/Location Settings," you'll want to modify your device's location. By selecting "Region," you may adjust your device's location by selecting multiple nations or adding a single country to display. It's time to complete a power cycle: turn everything off for around 15 seconds, including the TV, its connections, and the router.  Then turn them back on, first the router, then the TV and its cables; finally check your internet connection again. Read: How To Use Hisense Tv Without Remote Update TV Firmware It is likely that checking for software updates on your TV is the single most critical thing you can do for it. Here are the most important things to do. Press the HOME button on the remote to get to your TV's Control Panel. Choose Settings. Select System Information. Choose to update the software. The dashboard has a list of changes. Depending on the type of TV you have, you might or might not need to restart it. Have patience and let the update happen. But if you keep having problems, there is also another way to solve this issue. Do a Factory Reset People sometimes want to start over. If a Samsung TV isn't working right, there are several steps that can be taken to get it back to how it was when it was first bought. First, you'll need to reset your Samsung TV to factory settings. This will delete all settings, so make sure to back up any settings you might want to use again in the future. A picture of the current setup is also a good idea in case something goes wrong. Here's how to reset a Samsung TV to factory settings: Press the Settings button on your remote or the menu bar. Pick General. Click on Reset. Depending on what kind of TV you have, this may be called something different, but the general idea will be the same. Enter your PIN. The PIN for most Samsung TVs is 0000. After you do a reset, your TV will start up again. When it starts up again, make sure that the input device is set to the right one. First, you'll have to make sure your TV is connected to the internet. Then you'll have to run the first setup and wait for it to finish. Once your Smart TV is ready, you'll be able to add apps and games to it. Conclusion Samsung's app store is known for having bugs that prevent your TV from downloading any apps. Even if it might sound complicated, the solution to this problem is pretty simple: turn off and on the TV, update its firmware, as well as change its location settings. If none of those things work, you can check the connection to the internet or do a factory reset to fix the problem. FAQs This faq is here to solve some of the most asked question from internet regarding this matter. How do I upgrade my Samsung TV? Using the remote for your TV, go to Settings and then choose Support. Choose Software Update, then choose Update Now. Your TV will get new updates that will be downloaded and put on it. Most updates take a few minutes, so please don't turn off the TV until it's done. How do I find out what model Samsung TV I have? For older models, look on the back of the TV for the model code and serial number. You can find the model and serial number for a much newer Smart TV by going to Menu > Support > Contact Samsung. The following is what you will find.
-Read More
How to Add Subwoofer to Soundbar
Let's say you got a new soundbar for your home theatre but couldn't fully immerse yourself in the cinematic audio experience. What will you do next? In that case, a subwoofer can be a great solution. Also, subwoofers can be excellent for gamers who can profit from the extra bass. Make your content sound better by adding subwoofers. They let you "feel" low-frequency sounds, which makes your content more enjoyable to listen to. A lot of people use them for movies and video games, and they're usually part of midrange and high-end set-ups, too. Then How to Add Subwoofer to Soundbar. Let's start with this. Reasons why you would want to add a subwoofer to a sound bar It's possible to buy a soundbar package with external speakers or one that only has built-in speakers. Some of them even have subwoofers, which make them even better. Although some soundbars can give you great sound without any extra speakers, other soundbars give you basic sound. If you want to enjoy the whole audio system experience, you need a subwoofer. Your needs will be different, but most people would agree that a subwoofer is important. A subwoofer might make you think about whether or not you need one if you think about the pros and cons of adding one. This is a subject that we have a whole article about, but this is an overview: 8 inch vs 10 inch Subwoofer for Home Theater Purpose of a Subwoofer: It is very important to know what a subwoofer is used for before you decide whether or not to put one in your home. Subwoofers are loudspeakers that play low-pitched sounds. Other people can't do this. A subwoofer is very important for playing low-pitched sounds. In any sound system, subwoofers can make a huge difference in how it sounds. Flat-screen TV sound used to be better with soundbars. They used to be easy to add to your TV sound. But now they make great sound and are a good choice for surround sound systems. Subwoofers are very important for people who like movies and music. Subwoofers are no longer big, heavy towers. They are wireless and can be moved around, with very little power loss. Soundbars Need Subwoofers Soundbars usually have a lot of sound in the front. Because they are in front of your home theatre, this is why. Otherwise, your sound comes from this. Another thing is that soundbars don't have a lot of power in the bass. There are many ways to get a soundbar that sounds more powerful and rich with a subwoofer: Putting the subwoofer and Soundbar where you want them will make your living room, media room, or home theatre sound better. Even though the placement of the subwoofers varies from room to room, they work best when they are in the front and corner. In order to get the best sound, you should try different places in your room and home theatre. Soundbar Subwoofer Connection Countless soundbars can connect to subwoofers that are made by the same company. Many manufacturers let you add extra speakers and/or a subwoofer to your soundbar, as long as you use the right products. An automated way to connect There should be power cords on the back of both the soundbar and the subwoofer. They must be connected to the rear of each one of them. Eventually, plug them in to a wall outlet so they can charge. The sound bar should indeed be started to turn on, and the subwoofer will start to connect by itself when it does. When the subwoofer is fully connected, the blue LED on the subwoofer would then stop blinking. It lights up all the time until it decides to stop blinking. It doesn't work if the blue LED does not really stop blinking at the end of the process. Red is on. The manual connection If you need to pair this same subwoofer by hand, you can do so. This can be completed after the soundbar has indeed been serviced or the factory has been reset. There should be power cords on the back of both the soundbar and the subwoofer. They should be attached to the back of each one of them. At last, plug them in to a wall outlet so they can charge. With a pointed object, press the ID SET button on the back of ones subwoofer to set the ID number for it. Hold down until STANDBY will be off and LINK blinks fast. Turn off the soundbar, then press and hold Mute to turn it off. There are some soundbar models that don't have a button called ID SET which can be used instead. In order to set up an ID, you need to use the remote. if the ID SET button doesn't work, hold down the Up button. To learn how to use either of these buttons, look at your soundbar's manual. ID SET will show up on the soundbar's screen as long as you keep holding down. Turn on the soundbar. The blue LED on the subwoofer would then blink to show that it has been connected to the soundbar, as well as the soundbar will work. Until now, the main unit as well as the subwoofer have been linked together. The Blue LED should be solid green. This is how it should look now. There is no point in the process if the Blue LED doesn't blink. Then go back to Step 2. Turn off the soundbar and start over again. Soundbars that come with subwoofers. Another way to connect a soundbar to a subwoofer would be to buy them both at the same time. Many soundbars now come with a subwoofer and other speakers to make them sound more like a surround sound system. There are a lot of people who say that soundbars don't sound good because they don't have enough bass. For example, now there are a lot of soundbars in the industry that come with a subwoofer and other speakers. This is because multiple-speaker packs have become more popular. Even if they're not, almost all of them are. If you want to buy a soundbar with a subwoofer, after which check out our list of best soundbars! Many of them come with wireless subwoofers. Make sure you know how to use your soundbar before buying a soundbar package. If you already have a soundbar but wouldn't want to add a subwoofer, this is a good idea. At every price point, there are a lot of options. This means you can find a good one that meets your needs and makes good sound. The Jerry-Rigged Method for Adding a Subwoofer to a Soundbar You can add a subwoofer to a soundbar in a different way than most people do. If you have the right tools, you can do it. In order to do this, you'll need a receiver as well as a stereo mini mixer. You'll also need your soundbar and subwoofer for this method. You connect your soundbar to a receiver first, then you listen to music. Then, you can go from the pre-outs on the front left, front right, and centre channels to a stereo mix. From the stereo mini mixer, you then can connect to the soundbar, and then connect each and every subwoofer you want from the receiver with the subwoofer you want to use. This isn't the best way to do it, because you'll be giving up some sound quality with all these wires. If you don't already own all of these things, it might be better to purchase a new soundbar package with such a subwoofer instead. Is it possible to connect two subwoofers to a sound bar? As long as the two subwoofers are from the same brand, you can connect them both to a single soundbar. It also depends on what kind of soundbar you have. There are some brands that can connect to more than one subwoofer. So, it is important to make sure it is compatible and can be used with two subwoofers. The only way to connect two wireless subwoofers together is to connect one of them wirelessly and another with a cable. You can't use Bluetooth to connect two subwoofers to a soundbar at the same time. Instead, one of them must be connected to the soundbar with a cable. Always good if both of them are from the same company. In this case, both soundbars have to have RCA outputs in order to connect them to one another. To help you figure out the best way to deal with the second subproblem, here are some ideas. Subs like these should look like this: Make sure that you do have the right connections just on back of your car or truck. Buying a 3.5mm Y-Splitter lets you connect two subs to the same port. In this case, if you do have wireless subs, you can connect one of them via Bluetooth and the other one with a wire. Keep in mind that, at least, your subs should match. It's possible to use a different brand of soundbar, but your subs should be the same brand and make if you can. The task of connecting one wire and just one wirelessly is easy to do and connect it to one sound bar. Doing this would make the sound better and the bass more powerful. You can connect both an old and a new wireless subwoofer to the same sound bar. Steps To Connect Two Subwoofers To One Soundbars Using Bluetooth And A Cable Take the steps to finish the job: A soundbar can be paired with two subwoofers, one of which can be connected wirelessly and the other one can be connected by wire. When the subwoofers are connected to the soundbar with a separate cable, the sound is better. Turn Bluetooth on in all the subwoofers and also in your soundbar so that you can listen to music. Bluetooth is the only way to connect the subwoofer to the soundbar. Finally, bring a cable that fits the ports on both your second subwoofer as well as your soundbar, so that you can connect them to each other. Now, use the cable to connect them. In fact, if you can do this, you should be able to connect both of your wireless subwoofers to something like a single sound bar. How to Connect a Car Subwoofer to a Soundbar Correct Connection of a Subwoofer If you have an amplifier or receiver, it's likely to have a special RCA output that you can connect subwoofers to. Some of them have two different ways of being used. However, most of the time, only one output is used. This is because the second one is usually used to connect a second subwoofer to it. To connect the subwoofer, you need an RCA cable to connect it to one of the RCA inputs on the receiver.  They have a speaker that is double-coiled. The speaker itself has two windings on it, and the coil itself has two. In each of the windings, there is a completely seperate amplifier that can be used. As long as your receiver has one RCA jack for subwoofer connection, you connect the Y-cable (1 RCA to 2 RCA) to the two-line inputs of the subwoofer with its twin ends (RCA to RCA) (its inputs are paralleled). Connecting Two Subwoofers It's important to connect two subwoofers together if you have two front speakers. You can connect them to the amplifier's line output by using a Y-adapter RCA, or you can connect them to the amplifier's output ports in the same way. Connecting A Subwoofer to A Stereo There is a lot of electromagnetic interference coming from a modern car because it has a lot of electronics and a high-voltage ignition system. Analog electrical signals are indeed very sensitive to changes in them, so they are very important to them. So, when you choose a cable for audio signal transmission, look for coaxial shielded wires. The shielding braid on the cable that connects to the body of the car is very good at protecting the centre wire from interference. There are many different types of wires out there, and not all of them are the same price. In case you can't bite off the tip and look at the cut, you can look at the weight. As long and wide as a piece of copper wire, the aluminium wire weighs a lot less than that piece of copper. The finished wire kits always come with a control cable. Its job is to do this. The amplifier for the speakers in your car is usually near the subwoofer or built into it if the subwoofer is active. This is how it works: Separate wires are used to power the amplifier. Usually, there is a wire in the wiring harness that says "remote." This wire sends a signal to control plus when you turn on the stereo, and it sends that signal to your amplifier when you turn it on, too. Choose the best subwoofer for your soundbar by following these six tips: Soundbar Connections: The first thing you'll want to do before you buy an external sub for your sound bar is make sure it works with the one you already own. Look on the back of your sound bar. There should be a subwoofer output port. In fact, any powered subwoofer on the market will work with it if it has a built-in power source. Size of The Cabinet: Perhaps the main reason soundbars are so popular is that they don't take up much space in a room. If your lifestyle is important, you'll probably want a small subwoofer that can be hidden or discreetly integrated into a home's decor. For this reason, sealed cabinet subwoofers are often the best choice because they have smaller cabinet dimensions and footprints than ported subwoofers, which have bigger cabinets and footprints. Listening preferences and the level of playback: Soundbars can't produce as much sound as a 5.1 home theatre surround sound system or even a pair of full-range stereo speakers, so you don't need a huge subwoofer to make the bass sound better. Then again, if you love to dance to dubstep and watch action movies at the right volume level, a bigger, more powerful subwoofer might be right for you. A room's size: Having a small subwoofer may not be able to make your living room or finished basement feel alive with chest-thumping bass. If you have a lot of space, you might want to think about getting a bigger subwoofer or even two smaller subwoofers to get even bass response all over your listening area. Accessories for subwoofers: One way to make a room look less cluttered and make it easier to put things where you want them is to install a wireless subwoofer kit. You don't need to connect your subwoofer to your soundbar if it's on the other side of the room from the soundbar. RCA Y-adapters can be used to run two subwoofers from a single subwoofer output on a sound bar. Conclusion Listening to music over your soundbar has become a joyful experience. But if you want to hear more of the depth of your music with better sound quality, you might want to connect a wired or wireless subwoofer to your sound bar. By having a good soundbar with your TV, users can watch movies and listen to music at the same time. FAQs Why won’t my subwoofer connect to my soundbar? You might not be able to connect your subwoofer to your soundbar if the wall outlet is broken. Make sure it still has power. You might also have bad devices or not be plugging in the power cord the right way, so you might not be getting enough power. How do I connect my subwoofer to my soundbar without the remote? My soundbar doesn't have a remote. How do I connect my subwoofer to it? You can connect your Samsung soundbar to a subwoofer with the Samsung soundbar app on your smartphone. Make sure you connect your phone to a soundbar. Afterwards, press the ID button on the subwoofer and it will automatically connect to your phone. Can I connect a subwoofer to my TV? Plug the HDMI cable into the TV's HDMI port. Then, find the audio input port on your subwoofer and plug it in. As soon as you figure out how to do that, connect one end of the HDMI cable to the subwoofer.
-Read More
Home Theater Wiring Tips
Many people don't understand how home theater wiring works. It's hard to figure out all the different types of cables you need for your audio-visual equipment these days. Yes, it can be complicated, but that doesn't mean you can't do it on your own. If you're planning to build a big home theater system that changes the structure, you might want to think about hiring a professional home theater installer. Nonetheless, for many of us, all we need to do is spend a little time planning how we are going to connect our systems together, and we are ready to go. So, how do we go about setting up a home theater wiring? Let's find out. How To Do Wiring For Home Theater After connecting a few devices together, wiring your home theater will seem far less daunting than it initially appears to be. Wiring up the most common devices is covered in the following guide, but I also address the proper gauge of wire to use and the best approach to conceal the wires in your home theater.. Before you begin wiring your home theater, be sure you grasp the scope of the project. Professional help is recommended if you wish to install ceiling speakers or other showy gadgets that require structural changes. Do-it-yourself home theater installation is an option for those who want something more modest or are confident with their DIY skills. Be prepared for the possibility that the project will take longer than anticipated. The next step is to educate yourself with the types of cords and connections you'll be using in your home theater. Even though TVs and receivers for audio and video have the most connections, most manufacturers are considerate and clearly designate the various connectors. Inexperienced installers will have the most difficulty setting up speaker systems because they typically do not come equipped with the proper wiring. This means that you will have to purchase the appropriate gauge wire and do the final wiring yourself. Wire gauges will be discussed in more detail later, so it doesn't have to be too difficult. Read: What Need to Know About DTS Sound Basic Terminology Another thing you should know before you start wiring up your home theater is that there are different terms for the same thing. When people talk about their home theater equipment, they use words like interconnect, cable, and wire. But what do these words mean? It is something that connects two audio and video devices. For example, the wire that connects a DVD player to a TV, or the wire that connects a TV to a DVD player. A HDMI cable is a way to connect. Wire and cable are both words that are used to describe things that send audio signals from the amplifier to the speakers. However, these terms are used a lot together, and wire and cable are the most common. It does help to know the difference. Read: How to Turn on Sony Soundbar without Remote How well you know your wires There are many typical kinds of cable that you'll encounter while wiring your home cinema. Listed below are some of the most prevalent: HMDI TVs and other gadgets may be connected using this wire. A high-definition image is produced, often in 1080p. DVI Conventional projectors and computers are the most common applications for this kind of wire. SCART The only time you'll see these old-school wires is when you're trying to connect standard-definition equipment (such as a VCR). As a general rule, the majority of individuals who desire to accomplish this will already have some experience with these wires. Component High-definition photos may be sent over this connection, which is rather popular. Three different colored pins form the basis of a component connection (usually red, blue, and green). VGA/RGB When it comes to PCs and laptops, the most popular method of connecting them to each other is through a USB port. S-Video There are many items using this kind of analog video connection, however it doesn't generate as nice a picture as others. Coaxial This is a popular option among home theater aficionados for transmitting high-quality audio signals across devices. RCA stereo and multichannel Analog audio signals may be sent via RCA, which is available in two-channel and surround sound forms. In this essay, I go into great depth regarding these wires. The most frequent kinds of cable in a home theater are the ones listed above, although there are many more. If I listed every sort of cable and every technique to connect it, we'd be here all day. Instead, I'll stick to the most popular. Even if you're using a less common cable, it's probable that you already understand how to connect it. In general, these wires are quite simple to put together. It's a simple matter of plugging the gadgets in and you're ready to go. An adapter is all you need if one device doesn't have the correct sort of connection. They're simple to get online, and they'll cure a variety of problems. Read: How to Fix Samsung TV Optical Out No Sound Issue Follow the Safety Rules It's a no-brainer here. Safety is paramount when it comes to wiring, regardless of whether you're putting up a home entertainment system or just swapping out an old power wire in the kitchen. Use only cables and wires that meet or exceed all applicable safety standards. Fire, chemical, abrasion, and temperature change resistance are a few examples. A common mistake is to run the wires from beneath the chairs without properly insulating them beforehand. There is a risk of significant injury at the moment of the shot circuit because of this. Interconnect, Wire, Cable, or Lead: Which is better? Even the words used when connecting two systems together can be hard to understand. Anything that connects two AV devices is called an interconnect. e.g. from the DVD player to the amplifier. It is called a wire or cable when it sends audio from an amplifier to the speaker, and it is also called a wire. This is not true when it comes to wires and cables in home theater wiring discussions, where these terms are used very loosely. The term cable, lead, or wire is used by all types of connections. Wiring Your Home Theater Speakers So, as you can see, when it comes to connecting most of your home theater devices, all you have to do is plug the right cable into the right port. However, speakers are a little more complicated because they don't come with the right tools (like wires) and you have to connect them all together. So why do speaker systems not come with wires? Because people have different needs for their systems and different sized rooms, there can't be a single wiring system for every speaker. An audio system wired for 3ft rooms is not going to be very useful in a 9ft room, because it's not going to work. Getting the job done right doesn't take long if you have all the information you need before you start. The things you need to think about are: The size of your room There are a lot of speakers that you're wiring together. The level of sound quality you're expecting Whether or not you're going to hide the wires. Strings of thin metal called speaker wires let audio signals move from the speaker to the wires, where they can be picked up by the speaker itself. Simple, but there's more you need to know. The properties of the metal used to make the wires can help you figure out if it's going to work for you. Resistance and Impedance There is a certain amount of resistance in every cable, which is how much energy is lost when a signal is sent through it. A lot of people don't like it when people try to help them, but that's normal. The key is to balance the amount of resistance with how far a signal travels so that you can keep the quality as good as possible. Another thing to think about is the cable impedance. If we look at a circuit, this is how the voltage and the current work together. Mismatches in impedance can make a signal bounce back at any point in the circuit, which can damage your equipment and make your signal less clear. In this case, the reflected signal then shows up on your video device later than the original one. This is called "ghosting." It's a good rule of thumb that most home theater devices have an impedance of 75 ohms. It doesn't matter that this isn't very important, but it's good to know that devices can be connected without having an impedance match. Even so, it's important to keep in mind that if you have two devices that don't match each other in terms of impedance, you can solve the problem with a transformer, which are very easy to buy online. Getting The Right Type Of Wire A critical step in the installation procedure is deciding on the correct kind of cables to use. In my experience, many individuals see wiring as a last-minute task, which I've always found incongruous. Instead of investing much in high-quality gear, why not save some money by using bad wiring? Anyway, before I go into gauges, let's have a look at some of the greatest wire materials. It is important to know which metals are utilized in speaker cables in order to get the best performance from your speakers. The most common kinds of wire you'll encounter are: Copper There are several types of wire, but this is the least costly and most popular. Copper is an excellent conductor and has low resistance, however it oxidizes, which is a downside. When copper is exposed to oxygen, it becomes green. If left unchecked, this will lead to a significant rise in resistance. Silver Silver is more costly than copper, but it has a lower resistance. In addition, since it oxidizes, silver wire is seldom preferable to copper wire in terms of performance and cost. Gold The most costly metal is gold, but it is also the best. There is no oxidation, hence it has the lowest resistance and is the best conductor. However, because to its high price, gold is seldom utilized throughout the whole wire. Gold-plated connectors are common, although this is sufficient to increase signal quality. So, while deciding on speaker wire, keep in mind that resistance is a crucial consideration, and you want it to be as low as possible. Because copper wire is more affordable than silver, and "gold" cables are simply gold at the connectors, I choose copper. Copper wires are used in most cases. Here are a few more basic pointers to keep in mind while deciding on the right cables and putting up the speaker system. The longer a wire is, the more resistance it has. You should thus try to minimize the length of your cables. Plan your setup such that the distance between speakers is enough, but not so much that you run into problems with resistance. Keep your lengths the same, if possible. Again, this helps with resistance since wires of the same length have the same amount of resistance. A better audio balance will result as a result of this, and if your distance measurements are inaccurate, you will realize it immediately. Verify the area of the cross-section. A cross-sectional area's math isn't always useful in this context. A narrower cross section equals more resistance, according to the theory. Keep your cross-sectional area as broad as feasible in order to minimize resistance. Don't worry if this seems like a lot of information to take in, because it is. There are so many variables to consider when wiring a home cinema that I was completely stumped when I first started. Most wire makers, on the other hand, are really helpful and give thorough information on a wire's qualities, so all you really need to know is the gauge and the area to cover. These tidbits of information should help clarify the rest of the situation. What Gauge Wire Should You Use For A Home Theater? The most costly metal is gold, but it is also the best. There is no oxidation, hence it has the lowest resistance and is the best conductor. However, because to its high price, gold is seldom utilized throughout the whole wire. Gold-plated connectors are common, although this is sufficient to increase signal quality. So, while deciding on speaker wire, keep in mind that resistance is a crucial consideration, and you want it to be as low as possible. Because copper wire is more affordable than silver, and "gold" cables are simply gold at the connectors, I choose copper. Copper wires are used in most cases. Here are a few more basic pointers to keep in mind while deciding on the right cables and putting up the speaker system. The longer a wire is, the more resistance it has. You should thus try to minimize the length of your cables. Plan your setup such that the distance between speakers is enough, but not so much that you run into problems with resistance. Keep your lengths the same, if possible. Again, this helps with resistance since wires of the same length have the same amount of resistance. A better audio balance will result as a result of this, and if your distance measurements are inaccurate, you will realize it immediately. Verify the area of the cross-section. A cross-sectional area's math isn't always useful in this context. A narrower cross section equals more resistance, according to the theory. Keep your cross-sectional area as broad as feasible in order to minimize resistance. Don't worry if this seems like a lot of information to take in, because it is. There are so many variables to consider when wiring a home cinema that I was completely stumped when I first started. Most wire makers, on the other hand, are really helpful and give thorough information on a wire's qualities, so all you really need to know is the gauge and the area to cover. These tidbits of information should help clarify the rest of the situation. Some General Connection Tips So far, I've talked about how to choose the right wires, like which materials and gauges to use. It's also important to talk about how to actually install the wires. For the most part, connecting speakers together isn't too hard once you get the hang of it. It's important to remember that you're building a circuit, and each speaker needs to be connected in the right way for them to work together. Here are some other tips: Make sure you know which leads on your speaker wires are positive and which are negative before you connect them. Because this is a circuit, you must ensure that all of the components are correctly linked to one other. When connecting the speakers to one another and to the amplifier, this is critical. The result will be either no sound or terrible sound if it is not done correctly. If you don't want to use connectors, I propose getting some wire strippers instead. Remove about 1 cm of insulation from each end, and then twist the strands together so they're tightly bound. When this is connected to the speaker, loose copper strands might have an effect on the audio quality. The connecting terminals on speakers are either spring clips or binding posts. Spring clips, on the other hand, can only be used with bare wires or pin connections. Make sure your speakers are in working order before making a purchase decision on a speaker connection (if any). Binding posts, on the other hand, can accept any sort of connection, although working with bare wires is more challenging. Binding posts, as opposed to spring-loaded ones, provide a considerably more secure connection. When wiring speakers, electromagnetic interference (EMF) must be considered. A lot of cable may be a problem, especially if it's wrapped around itself. This is the reason why it is so critical to conduct accurate measurements. Try to keep wires out of mortal danger by concealing them in places where they won't be tripped on or damaged. To keep you safe, but also to maintain the wires in functioning condition, this is necessary. Because they're so delicate. Before you start measuring cords, develop a configuration for your speakers. To prevent the speakers from being squeezed too tightly together when connected, measure the distance between them and add an additional 15-20cm of wire. With this much leeway, you'll be able to get the job done. You might have too much distance between your speakers if they sound too quiet when connected. Opt for thicker cable instead of shifting the speakers (however, I suggest figuring this out before purchasing wire). How To Hide Home Theater Wires Setting up a home theater necessitates the use of a lot of wiring. It's understandable that someone like me would want to do all in her power to avoid having all of these cords strewn around. Even if it's not the end of the world, it should be avoided if possible. The most important thing to keep in mind is that cables may be a severe tripping danger. Even if you don't tread on or crush wires with furniture, they may still be damaged or even yanked away from their connections. Wires and devices will suffer as a result of these changes. For a home theater, how do you conceal the cables that connect the various components? "Trunking," as electricians describe it, is the simplest and least expensive choice. A variety of products fall under this umbrella word, but at its core it refers to a piece of plastic that is used to encase all of the wires and then adhered to a wall using glue or nails. This is a great method to keep all of your wires organized and out of the way, plus it's simple to put together. Plastic trunking is quite affordable and simple to get (see the image below). Self-adhesive backing is available on some at DIY stores and online, making installation more simpler. Although it is simple to conceal, it is not the most visually pleasant addition to a space in which it is placed. For the most part, I didn't like utilizing plastic trunking, but after a time, it becomes second nature. Its usefulness much outweighs its aesthetic appeal. However, if you're handy, the best option is to do the wiring inside the wall. Cables are hidden in wall cavities so they're out of the way, precisely as it sounds like. Installing low-voltage wiring by yourself is generally not restricted, but you should double-check (for example, if you're not the property owner or reside in an apartment complex) to make sure you're authorized. The fact that speakers are likely to be put on the wall makes this an excellent option. For my new home theater, I decided to go with a more professional and sleek aesthetic by using this method. A home theater may also be a smart option if you're remodeling a room and want to lay out the wires while you're at it, so it's a win-win situation for everyone. You'll need CL2 or CL3 certified in-wall wires for this. Designed for the function, they are the best. How To Hide Wires In-wall In spite of the fact that you'll need to cut and drill, drywall jobs aren't very difficult. Just a few holes need to be drilled, wires routed to their proper locations, and a few plates and brackets installed. Despite the fact that this may seem to be a simpler form, wiring speakers in any setting is quite similar. These guidelines can help you get started: Make a detailed plan before beginning any project. Make a mark on the wall wherever you want the speakers, A/V receiver, and TV to be. Make sure you plan everything out before you cut any wood. There is no turning back after you've dug a hole. Take advantage of any open areas that may be available. If you have a basement or crawlspace, for example, you may make advantage of them to minimize the amount of cutting required. Attic wiring may also be done, and then gadgets can be dropped into the gaps. Make sure you get lots of additional wire when making your purchase. Installing ceiling speakers? Make sure there's enough spare cable to set the speaker someplace while you link everything up, for example. Allow 10% to 15% extra wire than you think you'll need as a general guideline. Use this information to determine which wall plates best suit your needs. Wall-mounted volume controls are also available, so if you're going to drill holes in the drywall, you may as well install them. There are drywall support brackets designed particularly for speakers that may be purchased. The drywall must be removed before this can be done, so if you're constructing from scratch, these could be the better alternative. Make sure you obtain the proper junction boxes for your gadgets by doing some research beforehand. Finally, if you're running wire behind walls, be sure to use nail plates and secure them with screws. For example, if you're running a cable through a joist, a nail plate would be the metal component that covers the cable. The nail plate protects the wires from any future wall construction. Before Purchasing Equipment, Understand the Connections If you think about this before you acquire your equipment, it will make your life lot simpler. It's possible to factor in your intended method of interconnecting your devices when making hardware purchases. To avoid having to return a piece of equipment because the connection types it has aren't compatible with your current gear, this is a good idea. In other words, you don't have to purchase everything separately; you can only budget for the particular connecting cable. Check to see whether the wires you need have male or female connectors. Female connectors are the most common on gadgets. As a result, male connectors are required on the majority of cables. However, it's always a good idea to double-check the cable before purchasing it. What is the other device's input connection type? What gender are you? You can ensure that you purchase the right cable by first verifying this. There's no need to buy a new cable or adapters to fix your initial error if you use this. Avoid Overpaying for ‘High-Quality' Cables The picture/sound quality you'll receive from a cable isn't always directly correlated to the money you pay for it. For shorter cable runs, say 3-4 meters, a well-made no-frills cable will operate just as well as most costly cables and interconnects. Investing a little extra on long cable lines may be worthwhile, but don't overdo it. Most individuals won't be able to profit from any improvement since they don't have the high-quality hardware required. There is little difference in sound quality between inexpensive and costly cables for most casual listeners and watchers. That is, if there is any difference to be made. Separate power and audio-video cables Due to the low voltage of audio and video wires, electromagnetic interference might occur. Because of this, you must keep them apart. If at all feasible, run your power cables on one side and your audio-video wires on the other using cable hangers or managers. Looping power cords may also result in a humming or buzzing sound emanating from the speakers or scrolling bands on the display screen, therefore you should avoid doing this. You may solve this problem by plugging all your power cords into a single power strip or surge protector. Final Thoughts Wiring your home theater doesn't have to be hard. It can be hard to figure out which speakers are which in home theater development, but once you get the terminology down, it's not that hard. It's up to you to choose the right cables for your needs, so the best thing I can tell you is to make sure you plan everything out before you buy anything (or cutting any holes). FAQs Take this FAQ as a parting gift from us to help you with wiring of a hometheatre. Do I need conduit for speaker wire? If you are in an air space, you don't need a conduit to connect things. Ceiling tiles aren't strong enough to hold it up. In the NEC codes, they say that if the voltage is more than 100 volts, it must be in a conduit or have a suitable outer sheath.. How do I organize the cables on the back of my TV? If you don't want to have a bunch of cables behind your TV, use cable ties to keep them straight. To keep cables from getting tangled, plastic zip ties that cinch shut or hook and loop fastener strips wrap around bundles of them to keep them from getting loose or getting tangled. If your home theater components are close together, you can use these to keep them all in order. Does speaker wire cause interference? If you have high-level speaker wire in your system, it isn't likely to make noise. Buy primary wire for speaker wire and use a drill to twist the wire together, then run that to your speakers.
-Read More
Cheap Bluetooth Speakers With Good Bass
There are plentiful  pieces of technology available to boost the sound on your phone, tablet, laptop, or other devices instantly  and easily. If you're not intending on using headphones, speaker’s  the easiest approach to improve sound quality. There are couples of options available. Many of them cost hundreds of dollars. However,  not everyone has that kind of money to buy a speaker. For them, there are many brands providing adequate sound in a less expense. They aren't all unknown brands. If you’re running short of money to buy a Bluetooth speaker, this article is for you. We have listed out some Cheap Bluetooth Speakers With Good Bass. We've discussed the speaker which have the price  limit of around £100. If you have tight budget, several of these Bluetooth speakers are under $50. Check out the whole article and read the best reviews on the speakers. It will help you to choose the best headphone within your budget. Below is a list of the best portable Bluetooth speakers with bass. EarFun Uboom Portable Speaker [amazon box="B07SGXBR2H" title= " "] [/amazon] The EarFun Uboom is worth having  because it has all of the features we look for in an inexpensive bluetooth speaker with powerful bass. To begin with, Uboom boasts an appealing, small design with an IPX7 waterproof rating and simple top-mounted buttons. It's a pleasant surprise to find a USB-C charging connector as well as an auxiliary input in case you need it. Although there are no AAC codecs, the sound quality is good. Also, there is an outdoor mode, just like the UE Wonderboom 2. It provides 360-degree sound with the exception of the high end, which is missing due to the lack of tweeters. The Uboom has Bluetooth 5, which provides a good range and a long battery life. Furthermore, the latency is low, making it perfect for video, there's a mic for hands-free calling, and if you buy two, you can make a stereo pair. Key Specifications  3.5mm x 1 Audio input  Bluetooth 5.0 USB. USB-C 2 x 12 watts Audio power output Up to 16 hours Battery life Dimensions - 88 x 167 x 88. 585g. Pros  Easy to use Good bass and sound quality Good range bluetooth Longer battery life Cons May need an adapter to be charged Ultimate Ears Wonderboom 2 Speaker [amazon box="B07NFRCK7J" title= " "] [/amazon] Ultimate Ears is a brand of Bluetooth speakers that continues to attract. This is still a tiny bag, but it now has two-tone fabric and new buttons. That is, there is a play button at the top, so you don't have to fiddle with your phone to pause or skip a track. Despite its diminutive size, the Wonderboom 2 packs a punch, with a battery life that is 30 percent longer than before at 13 hours. It doesn't have a lot of bass because it's small, but that's the nature of this type of speaker, and it's still better than most of its competitors and predecessor. This helps an equalizer to create a sound profile that is better suitable for outdoor areas, where these speakers would normally struggle and sound muddy. The lack of an auxiliary input is the only thing that could turn you off from the Wonderboom 2.If you want to make a full stereo pair you can connect two speakers together, but the new Outdoor Boost mode is more fascinating. Key Specifications two 40 mm active drivers two 46.1 mm x 65.2 mm passive radiators. 360-degree sound 75 Hz – 20 kHz of frequency range Outdoor Mode booster. IP67 water and dust resistance Bluetooth supported simultaneous connection  Pros Small and handy Perfect for using outdoor Compatible to most of the devices Audio playback Cons  Does not have any auxiliary input JBL Clip 4 Bluetooth Speakers [amazon box="B08PJ7JMQM" title= " "] [/amazon] JBL has made yet another appealing Bluetooth speaker, and the current edition of the Clip is a fantastic speaker to take with you everywhere you go without spending a fortune. The palm-sized design includes a built-in carabiner, allowing you to attach it to almost anything, including a backpack, bike, or other object. The controls are simple to operate, and the speaker is now waterproof to IP67, making it entirely submersible. Surprisingly, a triple-click does not take you back to the previous track. If you need a microphone or an auxiliary input, you'll have to go elsewhere. The strong sound quality is outstanding, and the battery life is adequate, even with USB-C now being the preferred port. This is an excellent purchase because of the low price. MPN: JBLCLIP4BLKAM Model: Clip 4 Frequency response: 100Hz – 20kHz 40mm / 1.5" Transducer IP67 waterproof and dustproof 10 hours of battery life Pros Very reliable and durable Water and dust proof USB C port Built in caraben Cons No microphone or auxiliary input Tronsmart T6 Plus Enhanced Edition [amazon box="B088CZK377" title= " "] [/amazon] The T6 Plus from Tronsmart is one of the most intelligent non-smart affordable Bluetooth speakers we've tested. This tough waterproof speaker can not only fill a room with 360-degree sounds thanks to its two 20W drivers, but it can also be used as a 6600mAh power bank for emergency recharging of your phone or devices, as well as connect to your phone. With a click on your click wheel, you can activate your voice assistant. The sound quality is excellent for the money, thanks to Tronsmart's Sound Pulse algorithm and a dual passive radiator that deliver well-defined, balanced audio with no distortion. With compatibility for microSD, USB flash drives, and Bluetooth streaming, getting audio to the speaker couldn't be easier. This model has been updated to include NFC connectivity, which eliminates the need to pair your smartphone. The battery life is also good, with up to 15 hours of playback at 50% loudness. Key Specifications  Max power of 40W. 360-degree Surround Sound. Enhanced  Cylindrical Design. IPX6 Water-resistant. Rotating Wheel to control volume Up to 15 Hours of Playtime. Pros Have voice assistants like siri and alexa  Ultra premium bluetooth and battery Instant connectivity and pairing Stylish, comfortable and durable Very budget friendly Cons No cons detected Muvo Creative Play Speaker [amazon box="B07W4KHLVY" title= " "] [/amazon] The Creative Muvo Play is a low-cost Bluetooth speaker with decent bass.It has a pocket rocket the size of a pint and a lot to offer.We like the Play's compact design, which makes it extremely portable. This speaker also IPX7 waterproof, which isn't a given at this price, and the mesh only takes a few minutes to dry. Muvo features simple controls, and the 360 design, like many others, allows you to set the speaker almost anywhere and still get superb sound. Although it features a 3.5mm auxiliary input, you should use Bluetooth 5.0 for a superior wireless connection. If you want to make a stereo pair, you can connect two Muvo Play speakers together. For a low price, Creative gives a decent powerful sound. Although the speaker is well-suited to a wide range of music and podcasts, it struggles with bass, only going as low as 70Hz when human hearing reaches 20Hz.That is the one flaw in this otherwise fantastic speaker. Key Specifications  Bluetooth 5.0 Supports SBC 2 x 5W Power Output 70 Hz to 20 kHz Frequency  Waterproof  Provides Voice Assistants Analog 3.5mm Aux Input USB Type-C Charging port Pros Super portable Easy to use Google assistant Lightweight Crystal clear sound  Simple charging and connectivity  Cons Sometimes it goes lower as 70Hz Tribit Storm box Micro Speaker [amazon box="B07VSPPQXC" title= " "] [/amazon] Despite its compact size, the Tribit StormBox Micro offers excellent sound quality, especially when it comes to bass levels.Its small size allows it to easily fit in the palm of your hand, and the fixed strap allows you to attach it to your bike if desired. You’ll be able to take it about in any weather thanks to the IP67 water and dust resistant rating. However, you will only be able to connect using Bluetooth 5.0.There is no auxiliary port and the USB-C port is exclusively for charging.with an eight-hour battery life, a Bluetooth-only connection should suffice for most situations. Although the sound quality is sufficient to fill a room, we recommend purchasing two of them to use in stereo mode if you are hosting a large event. Otherwise, this speaker is ideal for individuals on a tight budget who want a portable speaker that delivers crystal-clear sound. Key Specifications  Bluetooth 5.0 30m Bluetooth range   9W power output 8 hours of battery life IP67 dustproof and waterproof  70Hz-20kHz frequency  Dimensions :9.8 x 9.8 x 3.5cm Weight 290g Pros Too loud and clear sound Admirable bass Wallet freindly Lightweight  Travel companion Cons No auxiliary port Tronsmart Force Super Bass Bluetooth Speaker [amazon box="B07MGSWD1F" title= " "] [/amazon] The Tronsmart Force is a Bluetooth speaker that has a lot of power. It has a shock-resistant rubber surround and a black metal grille on the front and back. Tronsmart is also waterproof to IPX7 level. However, you don't have to give up your intelligence because the design is outside. You can use Siri or Google Assistant, and there are many ways to connect as well. Besides Bluetooth 5.0 and NFC, the speaker has a USB port for connecting other devices and a 3.5mm jack for non-Bluetooth devices. It also has a microSD card slot for playing separate music. During a single charge, it lasts for about 15 hours. It has audio power that totals 40W. The speaker has a built-in equalizer with three settings: 3D Stereo, Extra Bass, and Standard. Each setting has a different setting. Generally, the Tronsmart Pulse has deep bass, clear mids, and crisp highs. However, sometimes the clarity is sacrificed in favor of overpowering bass tones, and the sound starts to distort at the highest volume.But for the price, you won't be able to find something that is as well-known as this. Key Specifications 40W Powerful Speaker. IPX7 Waterproof. Tri-Bass Effects:3D stereo, Extra bass and Standard Bluetooth 5.0. One-touch NFC. transmission range of 100 ft Up to 15 Hours Playtime. Voice Assistant  Pros Deep bass Independent music player Micro SD card slot Built in equalizer Maximum sound Cons No cons detected Kitsound Diggit  outdoor speaker [amazon box="B07B4XBZY5" title= " "] [/amazon] The Kitsound Diggit is a cheap Bluetooth speaker with good bass at a good price. It has a sleek, lightweight design and good sound.It’s portable, offers IP55 waterproofing and dust protection, and comes with a removable stake so you can plant it in the ground.The Diggit's design isn't important, but it has a clear, balanced sound and can be stereo paired in a second. While the pitch gets higher-pitched when the volume is turned up, this doesn’t create an unpleasant listening experience, especially when the music is primarily for ambient purposes. Otherwise, the bits are clear and the voices are like crystals .If you want to have a party outside, the Diggit is a good choice. It can also be used for indoor parties, like in a bedroom or living room.This makes it a particularly good option for students who have a limited budget. Key Specifications 2x 40mm driver. 5W dual-opposing drivers. 50 Hz – 20 kHz frequency  Optional stereo pair  10m wireless range. Bluetooth 4.2. Micro-USB. 8 hour battery life. Pros Student budget Higher pitch Lightweight style Clear and balanced sound Multiple speaker connection Water and dust resistant Cons No cons to mention  How To Choose a Good Bluetooth Speaker We’ve listed the best bluetooth speaker with a good bass at a reasonable price. But still it is very confusing to choose the best one as there are so many varieties and advantages. However, if you remain conscious of some aspects of a good speaker, you will be successful to buy the best one. To help you out, we will depict some common features of a good bluetooth speaker. Before buying any,do not forget to check the features. Bluetooth,NFC and Wi-fi Connection With a Bluetooth speaker, it is possible to listen to music from these small portable devices at a reasonable volume and without the need for headphones. Because Bluetooth speakers can be used in a variety of locations. With Bluetooth, it's a cinch to stream music from your phone or iPod to your speakers. Traditionally, a Bluetooth connection (5.0 is the most recent version) has a 10m range, which means that you can only play music from a speaker in the same room as you - much further and the audio would likely cut off.However, other speakers have a greater range, so it's worth checking the specifications of the speaker you're considering. However, NFC, Near Field Communications, can be used on NFC-enabled speakers to bypass the setup process and just begin playing music without having to enter any information.By merely touching two NFC-compatible devices together, a speaker can be connected via Bluetooth.Wi-Fi offers a far greater range and may enable you to listen to music from any room in the house.With that said, the Wi-Fi setup process may be extremely stressful and requires customers to install a special program on their smartphone, whereas Bluetooth setup takes less than 30 seconds, or even less if the device enables NFC setup. 360° audio A feature that appears to be gaining popularity in Bluetooth speakers is '360-degree audio.'360-degree audio is a term that refers to audio that is recorded in 360 degrees.To put it simply, it's a tube-shaped Bluetooth speaker with drivers facing all directions, rather than the standard front-facing speaker, to enable improved audio projection and 'room-filling sounds.'It's an excellent feature to have, and one that we actively seek for when purchasing new speakers.It was formerly reserved for high-end speakers, but has since made its way onto a number of affordable models. Battery Life  While a Bluetooth speaker's usual battery life was roughly five hours not long ago, we've entered a golden age of Bluetooth accessory battery life.With many affordable speakers giving up to 10-20 hours of playback on a single charge, we would not recommend purchasing anything less.Additionally, it's worth looking for speakers that double as portable battery chargers, as this feature will likely come in handy while using your smartphone to play music. Water an Dust Proof If you want to bring your Bluetooth speaker to the park or beach, it's is must to look for a speaker that is resistant to water, dust, and shock. While an IPX7 rating is not required for outside use, it is always a good idea to have some form of protection against spills, rain, and normal wear and tear, or you will rapidly find yourself purchasing another! Because water and electronics don't mix, waterproof speakers can be really useful.It is more common to find speakers with a waterproof design. You will certainly feel great to have speakers that are waterproof for usage in the pool or at the beach. Conclusion These are some of the cheapest bluetooth speakers with good bass. Bluetooth Speakers offering satisfying performance  under $100  are available in your near shops. These are the models that provides the best sound quality. You will not have to question about their frequency range. With advanced technology and high-quality drivers,they provide the best sound output. Do not make let to buy your suitable one and enjoy the music.
-Read More
How To Use Hisense Tv Without Remote
Hisense TVs are very popular because they have one of the best picture quality, which makes them popular. Among other things, Hisense Smart TVs have Dolby Vision and Audio and HDR10 display support, as well as the ability to install or download apps, and a lot of other useful things. It has a remote with wide viewing angles that make it easier to stream from all directions. So it's not a surprise that people love these TVs so much. Furthermore, their prices aren't too high, so many people buy one. But what if you notice that your remote control doesn't work right? Don't worry, because there are many ways to use your TV. If you don't have a remote, this guide will show you how to turn on your Hisense TV. We'll show you How To Use Hisense Tv Without Remote in a way that will help you. Let's start now! How to use Hisense TV without a Remote There are a variety of reasons why you may choose not to use a remote control to operate your HiSense TV. Possibly, the remote is broken, and you are waiting for a replacement that you have just bought. Alternatively, the batteries may have run out, or you may have simply lost the remote itself. Whatever the cause, here are a few tips on How To Use Hisense Tv Without Remote. Use the Manual Method on the Hisense TV Most Hisense TVs have buttons for setting, power, volume, and channel controls, but not all of them. People who own a Hisense TV can use these buttons at any time to control it without a remote. This is the best way to use these TVs. The new Hisense TVs are different, though. A power button is all that is on the most recent models. As a result, the only option is to switch on the television. When you do this, it is called the manual method. What about a Hisense TV? Users' Guide: In many models, Hisense places the power button right in the middle of TV's bottom edge, in line with the TV's bottom edge. These sensors are used to replace some of the physical buttons on some of the phones. There may be a lot of steps to find the power button this way. In most cases, the power button will be near the Hisense logo. It should be just below it. With a mobile app A lot of different apps are available for you to use to help you control your TV based on the OS of the TV. Roku TV and Android TV both come with apps that work perfectly with their TVs. Often, the phones that run these apps need to be on the same home network for them to work. It will be easy for Android devices to work with the Android companion app, and it will be easy for those with the Roku OS to work with the Roku app, too. With the Roku TV app There are many Hisense Smart TVs that run on RokuOS, a well-known TV OS. If you have lost the remote for your Roku Hisense Smart TV, the following steps will help: You can get the Roku app for iOS and Android devices. With the app installed, open it up and look for your Hisense Smart TV in the list. Make sure that your TV and your mobile devices are attached to the same WiFi network so that you can watch the same show at the same time. To use your remote after you connect to your TV, click on "Remote." This will open a new window. It's time to turn on the TV. To do this, just tap the power button that's in the middle of the screen. It's done! A Roku Hisense TV can now be used to change the volume, change channels, and go through the settings menu without a remote. With the Android TV app The new Hisense Smart TVs come with the Google Android operating system right out of the box, so you can use them right away. It doesn't matter if you lose your remote for the Hisense Android TV. You can still watch the Hisense Android TV. The Android Remote TV app makes it possible for this to happen, so it can happen. The steps to follow to connect are below: Take a look at the PlayStore or App Store to get the Android TV app. You can then start the app and read through the rules. There is an app for that. You can search for the Hisense Smart TV there. Make sure that your TV and mobile devices are on the same WiFi network. Connect the TV to the mobile device and match the code on it with the TV's code to play the game. Finally, use the Android TV remote app to turn on your Hisense Smart TV right away. The Android TV app lets you use your Hisense TV without having to use a remote, so this is how you can do it. If you want to type text on your TV, you can also use the keyboard inside of the app. There is also a touchpad in the app that you can use as a mouse to move your TV. Using Google Assistant Google Assistant is a well-known voice assistant service made by Google that can be used to control a lot of your Smart home devices. There are a lot of ways we can use Google Assistant to control the Hisense Smart TV. Make sure you have the Google Home app on your iPhone or Android phone. Make sure that your TV and phone are both connected to the Smart WiFi network before you play. You can see your TV in the Google Home app. To connect your TV to your Google Home app, just tap on it. The Hisense TV will work right from the Google Home app now that it has been linked up to the internet. In fact, you can use Google Assistant to control the TV, too! Different commands, like "Okay Google, turn the volume down" or "Okay Google, turn off the TV," can be given to Google.  If you want to watch a certain YouTube video, you can ask Google Assistant to do so. The Google Home app also has on-screen controls, like stopping or starting a video and changing the volume with the slider on your mobile device. These controls can also be found on the Google Home app. Using Google Chromecast In the event that none of the methods above work for you, Google Chromecast can help. Use a port on your Hisense TV to connect the device. Despite the fact that Google Chromecast costs extra, the amount of integration is great. Basically, it takes over the TV's OS. This version of the Google Chromecast works with the Chromecast app just on Smart device as well as comes with its own remote for easy set up. Take note that if you use Google's "Cast" service to show videos, your mobile phone is now the source of the video. The only way the phone can stream content is through the apps it already has on it. With the MiRemote app There are a lot of TVs that have an Infrared sensor on them that the TV remote can use to figure out what the person is doing. The infrared sensor is built into many Android phones, and many of them can be used. The user can easily take advantage of this by downloading remote apps, like MiRemote, which can work with a wide range of phones and tablets. Because this method is only useful if your mobile device has an infrared sensor, you should keep that in mind. This is an interesting way to turn on your Hisense TV. In the first place, make sure that your Hisense TV has an infrared sensor. This sensor picks up signals from the remote. However, your remote is not working. But, you can use this sensor to control your TV, as well. These days, the Android phones made by Google also have infrared sensors. To turn on your TV, they can be used the same way as a remote: MiRemote is a free app that you can get from the Play Store. Launch the app and follow the on-screen instructions. This is how you start the app. Also, this app could also be used to handle other electronics, such as the AC or the microwave, as well as Hisense TV. Use a Universal Remote Control Another option is to connect a universal remote control to your TV and use it to turn on your Hisense Smart TV. A universal remote can be used to control other things in your home. Let's say that you have one of these at home. If you want to use the universal remote to turn on the Hisense TV, you can pair it with the TV and then use it. When you want to connect your universal remote to your Hisense TV, you'll need universal remote codes. Hisense 4 Digit Universal Remote Codes 0220 0848 0219 0009 0780 0156 1170 0216 0696 0073 0508 How to Program a Universal Remote Control to a Hisense TV To finish the process of setting up a universal remote control on a Hisense TV, follow these steps: When you turn on your Hisense TV, put the universal remote next to the TV so you can use it. The TV button is on the universal remote. Find it and press it. It might take a while to hold the button down. When the LED light on the remote starts to blink, let go of the button on the remote. Use the number button on the remote to enter one of the codes from the list above. LED lights will flash twice and then go out after you use the correct code. The first code you enter might not work. Then, try another code until you find the right one. Finally, to see if you did everything right, press the power button on the remote. If the TV turns off, you have set up your universal remote to work with the Hisense TV. Try a different code if that doesn't work. Parting Words Still not sure how to use your Hisense TV without a remote? If you don't have a remote, there are a lot of ways you can still use Hisense TV. Even though it's easier to control your Hisense TV with the remote that came with it, you should be aware of other options if the remote doesn't work properly. It's possible that you don't want to use your phone or tablet as a remote. You can always order a new one or buy a remote that works with almost all TVs. There is a lot of information in this guide that we hope will help you learn how to use the Hisense Smart TV without a remote. Nothing will stand in your way when you want to watch your favorite shows on your Hisense TV. Frequently Asked Questions Does Hisense TV have buttons? Yes, Hisense TVs have physical buttons that you can press to do different things. The physical buttons have controls for volume, channel, and other things, too. Some models have a lot of buttons, but the most recent models only have a button to turn on the lights or turn off the lights. Can I control my Hisense TV with my phone? With the Hisense Remote NOW app, your smartphone or tablet can act as a remote control for your TV, giving you the best possible connection. How can I control my TV without a remote? In most TVs, there is a power button right below the screen. It can be in the middle of the screen, on the left or right side, or anywhere in between. You can push and hold the button for a second to start the TV. To turn off the TV, you can also press the same button or use the same joystick. You can also use a universal remote control to control the TV if you don't have the original remote. Where are the manual buttons on a Hisense TV? Most of the time, you can find the power button at the bottom of the TV. There are no other manual buttons on Hisense's TV. They're all on its right or left side of the device. Can I control my Hisense TV with my phone? The answer is yes. Using the RemoteNOW app from Hisense, your smartphone can be used as a remote control for your Hisense TV, making it even easier to use and connect. It works with all Hisense TVs in the Series S8, Q8, P, and R.
-Read More
How to Connect 4 Speakers to a 2 Channel Amp
Connect four speakers to a two-channel amplifier if you know the impedance of the speakers and divide the power evenly across the channels. let's find out How to Connect 4 Speakers to a 2 Channel Amp. Connecting four speakers in a row or a group can be done. If you have a different kind of speaker and amplifier, it will change the way you do things. An amplifier's impedance and limits are very strict on both speakers and amplifiers. In series connections, the impedance rises, but in parallel connections, the impedance falls. Impedance must stay within the amplifier's limits at all times. If it's too heavy, it could hurt people or make them have a bad experience. Know whether to use parallel or series method Determine the maximum and lowest impedances of the amplifier you want to use to connect the speakers to the amplifier. The amplifier will be damaged if the load is lower than the minimum impedance. As a result, ensure that the weight does not fall below or exceed the set limitations. The impedance of the amplifier and the speakers may be found in the handbook or on the label. Incorporate the additional impedance of the two speakers you'll be connecting to a single channel at this point. If the total impedance of both speakers falls within the amplifier's capabilities, connect them in series. As an example, suppose you have two 4-ohm speakers. Powers are multiplied when we link in series, as you are aware. So, 8-ohm is the sum of the two powers. The series connection will work as long as your amplifier is capable of handling 8 ohm per channel. Parallel connections may be used if series connections are not possible. Divide the sum of two speakers' impedances by the sum of their impedances. A parallel connection may be made if the response falls within the parameters. You can't use the amplifier if the impedance of both routes doesn't meet the amplifier's requirements. Once you know how you'll be connecting them, wiring them is a breeze. Solid State Amps vs. Tube Amps: Which Is Better? One thing to think about when figuring out how many speakers you can use with your system is how your amp is built. There are two different ways to do this right now. Depending on your system, you might have a solid-state amp or a tube amp. Because solid-state amplifiers have a lot of power, they can be hard to work with in a multi-speaker system. That figure changes when the impedance changes. That means that you can get more power with a lower impedance, which could make an in-parallel wiring scheme not work as well. If you have a tube amplifier, the power ratings will not change even if the impedance changes. You don't get an advantage or disadvantage with this equipment when you use it in series or in parallel. This makes it more flexible for some people, making it a better choice for them. Wiring 4 Speakers in Series The positive end of one speaker is linked to the negative terminal of the second speaker in a series circuit. circuit. Assume that two speakers on the left side are connected in series. First, connect a wire from the amplifier's positive terminal to the speaker's positive terminal. Connect the wire from the negative speaker terminal to the positive speaker terminal now. Afterwards, connect a wire from the second speaker's negative terminal to the negative terminal of the amplifier's left side. The left channel of the amplifier is connected to two speakers in series in this manner. Make sure you connect two speakers to the proper channel. As a result, two-channel amplifiers will be used to link all four speakers in series. Our first choice for connecting four speakers to a two-channel amp is to use series wiring. It's time for parallel wiring. Pros of Having a Series Circuit The setup makes the amplifier run more efficiently or with less heat because it makes the equipment more resistant. Each speaker gets a certain amount of the amplified sound. You get a stronger bass EQ with a lot more emphasis on the low frequencies. Cons of Having a Series Circuit When one connection is broken, it can stop all of the speakers from working, which can be very bad. It might be hard to hear the sounds coming from the speaker at first. Wiring 4 Speakers in Parallel Let's say we wish to use two speakers in parallel to link the left channel. Connect the wire from the left channel's negative terminal to the first speaker's negative terminal. The first speaker's positive terminal should be connected to the left channel's positive terminal via a wire. Using this method, we may link the left channel and the first speaker's corresponding terminals together. Using the same method, connect the first speaker to the second speaker. Two speakers may be linked in parallel to a single channel in this manner. As a result, two amplifier channels are used to power all four speakers in tandem. Parallel wiring is the last option for connecting four speakers to a two-channel amplifier. Pros of Having a Parallel Circuit This means that if one of the connections is broken, the other three speakers can still work with the amp's help. The lower the impedance rating, the more acoustical output there is. There is a way for the speaker output to go up, because the amp's power output goes up, too. Cons of Having a Parallel Circuit If there is a short circuit in your setup, the changes in current can make your installation get hot. Your load impedance must be at least 2 ohms, or the lowest setting your amp can handle. Tips For Wiring 4 Speakers To 2 Channel Amplifier Avoid overloading the amplifier, since doing so will only cause it to fail. In order to improve the sound quality, you must increase the power of the amplifier, not just increase the size of the speakers. If you want to increase the volume of your music, you need also improve your speakers and amplifier. Checking the impedance of your audio system is a must if you want it to last for a long time. To produce a clean sound and deep bass, always keep the amplifier's load below the limit. All of your delight will be snuffed out by distortion caused by a full load or overload. You can simply connect four speakers to a two-channel amp without damaging any equipment or sacrificing sound quality if you follow all of the steps. Speaker Selector Switch Connecting four or more speakers to a two-channel amplifier is the most straightforward and safest method. What Is a Speaker Selector Switch? Multiple speakers may be fed music at the same time while keeping the amplifier from overheating via speaker selection controls. Typically, they are used with low-power amplifiers of about 100 watts. Protecting yourself is a failure. It is possible that the amplifier will go into protection mode, preventing further damage in the worst-case scenario. With this approach, you just plug in the selection box to the output jack of the amplifier, and then all of your speakers will be connected. The amplifier won't be overloaded because of speaker impedance issues thanks to the selection switch. Depending on the switch, you may also be able to adjust the level of each speaker separately. If you're installing speakers throughout your house, this method is perfect for you. When used with amplifiers rated at more than 100 watts, however, it may not operate as effectively. Please consult this page on distributed speaker systems for business audio installations. Connecting Passive Subwoofers and Loudspeakers to Your 2 Channel Amp If you plan on attaching a passive subwoofer to your 2-channel amplifier, you will need to follow some extra procedures. It is not straightforward; all that is required is the connection of an RCA cable; nevertheless, there are certain limitations.  When developing this link, there are a few factors to keep in mind. In addition, we have a comprehensive explanation on how to connect passive subwoofers to powered amplifiers using speaker cables or speaker wires, which you can access here. What If My Speaker Has 4 Terminals? You can bi-amp or even bi-wire your speakers if they have four connections. Learn how to connect speakers using terminals in our how-to tutorial. Connecting Multiple Speakers to An Amplifier Adding a second speaker to an amplifier often entails increasing the amp's power draw in some way. To put it another way, a pair of speakers has double the power of a single speaker. Two speakers will be no problem for most amplifiers. There are some drawbacks, though. If you have more than two speakers connected to the amp at once, the amp may overheat and shut itself down, or it may blow an internal fuse. Speaker Selector with Volume Controls A more practical (and more costly) solution is to replace the selection switch with a volume-controlling device. This enables the central management of the volume in each zone (region with a pair of speakers). In addition to impedance matching the four speaker selector volume switches, some volume control systems provide these as well. These devices contain a switch (usually on the back panel, but occasionally inside) that enables you to tell it you are connecting 2, 4, or 8 pairs of speakers to the same amplifier. You don't have to worry about overloading the amplifier once this switch is in place. Despite the lack of a switch on certain models, the default is to use four speakers. To the amplifier, impedance matching seems to be a single speaker, but in fact it equally distributes the signal to all four speakers, so that each speaker receives only a quarter of the sound produced by the amplifier if the x4 switch is activated. The impedance matching of other volume control devices is missing. These systems are predicated on the assumption that you won't need to crank up all four sets of speakers at once. Some setups may benefit from this, even if it isn't as safe as impedance matching. To play low-volume music in the family room and workshop, this is a good option. Just make sure the workshop and living room are turned down so that just one or two pairs of speakers are connected to the amplifier if you are hosting a party and want loud music outdoors. It is important to remember to include volume controls for the lounge area speakers as well. In-Wall Volume Controls When the phone rings and you're a long distance away, it might be inconvenient to travel to the living room to adjust the level of the speakers. Therefore, having a volume control in each place where speakers are present might be helpful. The speakers' volume may be changed in the workshop this manner. In the event that you leave the volume control up (say for the outdoor speakers) and play music without going outside the following morning, you'll be entertaining the neighbors both morning and night, even though you're not really outside. There are in-wall volume controls, which are identical to the volume controls stated above, except that they may either be impedance-matched or not. Impedance matching is often required when using more than one speaker. On the rear of the impedance matching volume control, choose x2 if you have two zones (two pairs of speakers or four speakers). When employing three or four sets of speakers, you'll want to go with x4. Consider the fact that most of these controllers are "in-wall" devices. On a solid brick or concrete wall, you'll need a large mounting block or an even deeper depression in the wall if you want to hang them. It is common for volume controllers to have transformers that are deeper than ordinary wall mounting blocks. The wider the volume control recess, the more power it can handle (and the more expensive the control). Volume controls may be easily wired. You'll need to connect a speaker cable (usually two), which will go from your amplifier to your volume control. Then, connect each speaker to the volume control by running a speaker cord from it. Remember to include a volume control for the speakers in the living room. Two, four, or more speakers can benefit from this strategy. Practical Considerations in Wiring Four Speakers They will work, but there are some problems with them, like not having enough space. Because of how the amplifier controls volume, there is a big problem. Here, you can set the maximum volume for all four speakers. The individual volume controls for each speaker only change the level of sound coming from the amplifier. They can't make the sound louder than the amplifier can make it sound. So the amplifier volume control should be turned up to the point where you want to be able to hear the loudest sound from each speaker at once. That's not a good idea. There is a better way to run the amplifier than to run it at full power and then only let the clutch out a little bit. This is like revving the car engine at full power and then only letting the clutch out a little bit. You should set up a system like this: Turn all of the speaker volume controls all the way up, then turn them off again. It will take a little while to get to a point where the music is just a little louder than you would normally want. This is where the volume control for the amplifier is. In this case, you can now turn down each speaker a few steps until it sounds the way you want. The above method will work fine until someone changes the volume with a remote. A lot of the time, when you watch movies or TV and listen to the sound through your HiFi amplifier/speakers, this will happen, too. You can hide the remote control, but this isn't always the best way to go about it. If you don't need it, there is a better way. The speaker selector switch or the volume controls can be used in a lot of different places. They are very good if you want the same music to be played all over the house and you don't want to touch the amplifier. Several of these systems have been set up in homes where the amplifier is only turned on in the morning and turned off at night. Sometimes, the amplifier is put in a ventilated cabinet so that it can't be seen or touched. This lets the family move around the house and listen to the same music in each room. However, if your amplifier is used while you're watching TV or movies and you keep changing the volume with the remote control, the other speakers in your house will also be changed to the same volume level as well. In order to solve this problem, all you need to do is get a second amplifier. This is the way I like to do things. When you connect the line out of the main amplifier to the "slave" amplifier, you will get better sound. A HiFi amplifier volume can be changed as much as you want without having an effect on any other speakers. This way, the program is the same in every room; however, the HiFi amplifier volume can be changed as much as you want, without having an effect on the other speakers. The volume on the slave amplifier can be set (as shown above) and then not changed again. This is how it works. An old "stereo," a second-hand stereo, or a new stereo could be used as the slave amp. Some HiFi (main) amplifiers have a power socket on the back that can be used to connect other things to the amplifiers. if so, then plug the slave amplifier into this power socket and it will be turned on and off at the same time as the main amplifier. What Should I Expect to Pay for a Great Amp? Using a two-channel amp to drive four speakers requires a minimum 8-ohm impedance rating. Using a 16-ohm unit will make it much simpler to get the installation you desire. Most high-quality sounding amplifiers may be found for about $200 and $500. Even if you can find cheaper units, you may not have enough electricity to distribute with the building. Over 16 ohms normally costs at least $750 to get the best results. The top units in the business now cost between $2,000 and $4,000 after you go past the 20-ohm mark. Expect to invest $10,000 if you want a model that provides unconditional assistance and is very flexible. The Bottom Line These methods will work, but it's important to make sure that your amplifier doesn't get too much power. Remember that connecting the speakers in series enhances the amplifier's impedance, but connecting them in parallel decreases it. That could very quickly damage your amplifier. Another common way to connect 6 speakers to a 2-channel amp is to connect them to 6 speakers. If you don't want to damage your amplifier, the best way to connect your multiple speakers to a single amplifier is to use a selector switch. It not only ensures the safety of your amplifier, but it also simplifies the process of setting up and controlling your sound system much more straightforward. FAQs Can you bridge a 4-channel amp to 4 speakers? Speaker level signals can damage your head unit's RCA outputs if you connect both the speaker level and RCA jacks at the same time. If you want to put in a 4-channel amp for 4 speakers and a subwoofer but only have two stereo channels, that's fine. How many RCA cables do I need for a 4-channel amp? For a 4-channel amplifier, you will need two RCA wires. For your front and rear speakers, each RCA cable will have two signal channels: left and right for your front and rear speakers, and left and right for your rear speakers. This means that each cable will have two signal channels. If you want the sound quality you want, then that's how to get it, too. What is the difference between 2 and 4 channel amps? It's easy to say that with a two-channel amp, you'll be able to fully power two speakers. It can then feed up to four speakers with the sound. That's about all there is to it. Remember that each channel is a separate power source that can only power one speaker at a time.
-Read More

ADVANCE COMPARE ENGINE

Select Two Audio / Video System for Detailed Comparison

ADVANCE SEARCH ENGINE

Find Your Sound System by Any Desire Specification